Category Archives: VARIOUS

Lake Apopka Postcard

Hello faithful readers!  This is my first post in a new category I’ve created on the blog that I’m calling “Postcards”.  I’m going to occasionally post photos here that are typical Central Florida scenes – like a postcard.

You’re welcome to download them at full resolution for your personal use.  I’m going to use the Creative Commons Attribution-NonCommercial-ShareAlike 4.0 International license for these instead of “All rights reserved”.  Please visit this page to see details and restrictions that apply:  https://creativecommons.org/licenses/by-nc-sa/4.0/.

In the future, they should be easy to find using the “Places / Categories” pulldown menu over on the right side of the blog and selecting “Postcards”.  If you’re viewing the site on a phone, you might not see that menu – if so, just type “postcards” into the search box.

Anyway, the first photo in the new series is this one:

Bird on a bush – Great Blue Heron at Lake Apopka

To download, just click on the image to go to the source and then right-click to download it.  I hope you like it!

Thanks for stopping by and reading my blog. Now – go make some photos!

©2018, Ed Rosack. Creative Commons, Attribution-NonCommercial-ShareAlike 4.0 International license


My new, old camera

Whoops – I did it again!  I bought another old camera.  I’d never noticed one like this before.  When I looked it over, it seemed to be in good shape – too good to pass up.

Auto Graflex Single Lens Reflex camera

It’s an Auto Graflex Single Lens Reflex made by the Folmer & Schwing Division of Eastman Kodak around 1920.  The company was in operation from 1898 to 1973 and was owned part of that time by Kodak.  They built a variety of models, but by the 1920s this basic design type was typical.  It came in several sizes and some models used roll fill while others used sheet film. This one has a non-revolving 3 1/4″ x 4 1/4″ roll film back.

Auto Graflex Single Lens Reflex camera roll film back

The controls work surprisingly well for a wood and metal device that’s about 100 years old. The aperture functions and the exposure times are slow, but could maybe be adjusted back into spec.  Pretty amazing for a mechanical device this old!

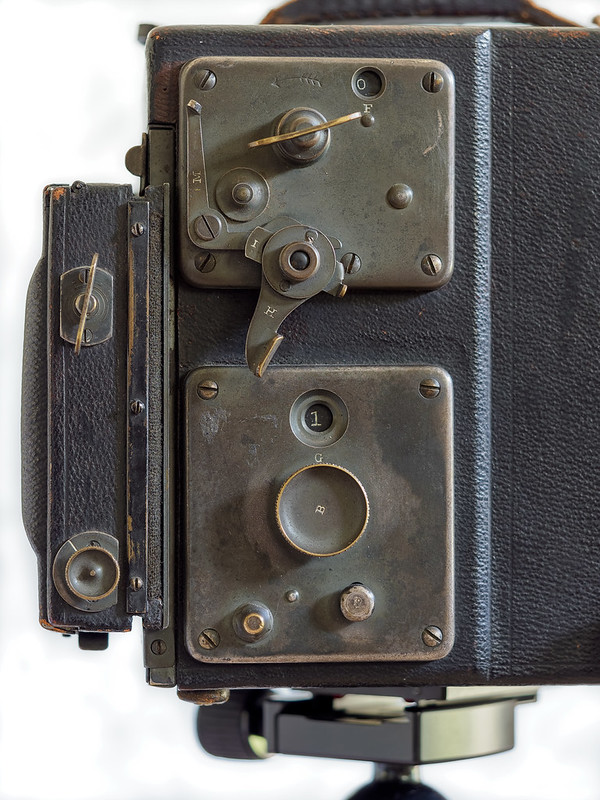
Auto Graflex Single Lens Reflex camera - controls

You set exposure by changing the size of the vertical focal plane shutter opening (using the crank and window marked “F”), and how fast the shutter moves over the film (with a tension setting using knob “B” and window “G”).  There’s a handy cheat sheet riveted to the viewfinder hood that translates these settings to equivalent exposure times.  The range from 1/10 to 1/1000 second seems large for a camera of this era.

Auto Graflex Single Lens Reflex camera - settings plaque

The lens is a Kodak Anastigmat f/4.5, with a focal length of 5 1/5 inches (just about equivalent to a 50mm lens on a 35mm full frame camera).  According to the web, it was highly rated at the time.

Auto Graflex Single Lens Reflex camera

The viewfinder is usable but dirty.  I think running film through this would be difficult, since that type of roll film isn’t made anymore.  But I took it out in the back yard so I could look through the viewfinder in bright light.

Here’s a close-up of an image through the camera’s lens on the focusing screen inside the viewfinder.

I enjoyed researching this and playing around with it.  It’s an interesting collectible and looks good in my camera cabinet next to a couple other old Kodaks. You can find out much more about Graflex cameras on-line.  Start with these links:

Thanks for stopping by and reading my blog. Now – go make some photos!

©2018, Ed Rosack. All rights reserved

Grand vista or Up-close and Intimate?

Last week I mentioned that we spent time photographing Amicalola Falls during the Focus on Atlanta Workshop.  I was also there in 2014  and when I got home, I was curious to compare images from the two visits.  That led to some observations and questions.

This first photo is from 2014.  I reprocessed it, mainly to correct some blown highlights in the water.  First observation:  Blown highlights bother me a lot more today than they did back then.

I made this from the foot bridge near the top of the falls.  Second observation:  It’s quite a hike, especially with a load of heavy camera gear.  But it’s well worth it for the wonderful view!  With a wide enough lens, you can try to show the grand scale and sweeping power of the falls.

Amicalola Falls

Amicalola Falls – The grand view from the footbridge near the top.  Nikon D800, ISO 50, 16mm, f/22 @ 1/3 sec.

I really like this photo, and I’m glad I made it.  Third observation:  Four years later, I think that it was a bit too easy.  Probably everyone that visits these falls will try for an image that looks like this.

The next three images are from 2018.  I must have been anxious to get the grand view photo in 2014 and hiked right by these locations – I don’t recall noticing them.  On this  recent visit, Mike Boening pointed out several spots along the trail and I stopped at a few and set up for more intimate photos.

Light in the creekLight in the creek. Olympus OM-D M II, Hi-res mode, ISO 200, 28mm eq., f/8 @ 1 sec.

On the way back down, the last spot I stopped at was only a few yards from the parking area!

FlowFlow. Olympus OM-D M II, Hi-res mode, ISO 200, 40mm eq., f/8 @ 1.2 sec.

I like the grand view image I made in 2014, but I think I like these 2018 images even more.  There are probably quite a few photos of Amicalola similar to my first one.  I suspect that images like the second and third are much less common since the number of possible viewpoints and compositions is so much greater.

Sometimes, only one approach will work for a subject or your style of photography.  On the drive up to the falls, we stopped at an overlook and I was fascinated by the fog / mist and low clouds moving through the valley.  I was able to poke the small lens on my iPhone through the chain link fence to grab this frame.  At the time, I didn’t think about an intimate detail type of composition there.

Foggy mountain viewFoggy mountain view

But that’s just me.  I saw a photo later that showed Mike making an image of some graffiti on the road.  Last observation: Graffiti isn’t something I normally photograph and I didn’t even pay attention to it at the time. Our usual photo styles can limit the potential images we see.

So what’s the moral of this story?  Should we make grand scenic view images or intimate, up-close photos of the details?  You know what I’m going to say , don’t you?  “It depends”.

Actually, I’m going to say:  It depends, but try hard to get both.  You’ll grow as a photographer if you can teach your brain to see both ends of this spectrum.  Shoot whichever you prefer first, but force yourself to look for the other compositions before you leave a spot.

As always, click on these images to see a larger version on Flickr.  And you can see other photos from the workshop in this album and other photos from Georgia in this one.

Thanks for stopping by and reading my blog. Now – go make some grand, and some detailed photos!

©2014 and 2018, Ed Rosack. All rights reserved

Infrared evolutions

This is a long article about Infrared (IR) image processing.  If you don’t process IR photos, feel free to just look at the photos!  And please take a look at the new Infrared Gallery I added under the Galleries / Portfolio menu at the top.

You probably know I like IR photography. I’ve written about it before (click here to review my posts) and I often include IR photos in this blog. Here’s a recent example:

Circle B Bar Infrared 1Circle B Bar Infrared 1 (four frame vertical panorama)

Infrared’s an interesting medium.

  • IR captures invisible light:  a portion of the spectrum that’s different from what your eyes can see.
  • The spectral response makes blue sky look dark and foliage bright.  This reverses a normal daylight scene’s brightness values.  It helps tame contrast and allows you to shoot even when the sun is high in the sky.
  • Since your eyes can’t see infrared, your interpretation of the alternate reality is up to you.   You can process IR in Monochrome or as a false color image.
  • IR can sometimes capture details that aren’t seen with visible light.
  • If you use a modified digital camera, you may see improved detail in your photos. The conversion process removes the IR blocking / anti-aliasing filter.  In many digital cameras this slightly blurs the image during capture to lessen Moire and other aliasing artifacts.
  • I’m not really qualified to discuss shooting IR film – I’ve only done it a few times.  But I will say that modifying a mirrorless digital camera is a great way to approach infrared.  The mirrorless design eliminates any issues with IR focus.  The camera’s built-in exposure meter works well and values are close to the normal visible light ones, so you can hand hold in daylight conditions.

Another example:

Circle B Bar Infrared 3Circle B Bar Infrared 3 (three frame vertical panorama)

By the way, all the images in this post are from from an early March trip to the Circle B Bar Reserve.  I’m really glad I carried my IR camera on our hike!  Here’s another:

Eight Cedar Waxwings

Eight Cedar Waxwings – I forgot to bring the spare battery for my main camera and ran out of charge. So I switched my long lens to my IR modified body and kept shooting.

So what’s the point of this post?  I’ve struggled lately with how I process my IR images.  The work flow I’ve used seems to result in too much contrast / clarity.  I just felt that the results looked a bit “digital”.  So I’ve searched for new methods and I’ve found one that I like.  I’ve used it on all these photos and I feel that they look much more “organic” and much less “digital”.  What do you think?

Five nest Cypress

Five nest Cypress (five frame vertical panorama)

Here is my updated workflow:

  • Capture the RAW images with a modified micro 4/3 mirrorless camera.  Aperture priority, mostly handheld (although I do occasionally use a tripod).
  • Import into Lightroom to save the master files.  Then decide which ones are worth processing and discard the seconds / rejects.
  • Batch process the “selects” through DxO Optics Pro to take advantage of its noise and camera / lens module processing.  This step returns copies back to Lightroom in Adobe DNG RAW format.
  • In Lightroom, apply a custom camera profile to optimize the white balance (see this article for how to create one).  And if it’s a multi-frame image, stitch it together with Lightroom’s merge to panorama function.
  • Sometimes, you can use Lightroom’s B&W conversion and finish an image.  But I’ll open ones I really like in Photoshop.
  • There, straighten and crop, use the content aware fill, and clone if needed.
  • And here’s the new step in my workflow:  I’ve been using Skylum Software’s Luminar for IR B&W conversions. I found a very nice starting point for IR processing here: Laurie Klein’s Infrared Mastery presets.
  • Finally, it’s back to Lightroom for any final adjustments (tone curve, sharpening, vignette, grain, etc.).

Circle B Bar Infrared 6Circle B Bar Infrared 6 (five frame horizontal panorama)

Could I achieve this look some other way?  Maybe even with a lot fewer steps?  Yes, I’m sure it could be done.

Circle B Bar Infrared 2Circle B Bar Infrared 2 (three frame horizontal panorama)

Just a few years ago, we only had Adobe Photoshop and then Lightroom to process RAW images.  One of the great things about photography and image processing today is that there are so many ways to do things.  That’s also bad, because it takes a lot of effort to study all the options and find out which ones work best.   It seems like each program has strengths and weaknesses.

Software is changing every day, but I don’t know if there will ever be a single image processing program that does every thing I want.  For now, I’m happy with the results I’m getting using this somewhat complex workflow.  That doesn’t mean I’ll stop looking for new or simpler ways to do things.

If you have time, please take a minute to look through the new IR gallery.  I think it represents some of my best IR images.  I also have a Flickr album with many more IR photos at this link:  https://www.flickr.com/photos/edrosack/albums/72157628062119778.

If you’ve read this far, thank you!  That probably means you’re very interested in IR.  If you have any questions about this, let me know in the comments and I’ll try to answer.

Thanks for stopping by and reading my blog. Now – go make some IR photos!

©2018, Ed Rosack. All rights reserved


Dancing Hawk

Lynn and I were away, visiting our first grandchild – what a wonderful experience that is!!!

Anyway, this blog is about nature photography and I haven’t been able to do much of that recently.  So when we got home, I was eager to go back out and ended up at Orlando Wetlands Park last Thursday.  I made several photos I like.  This one is my favorite from the trip:

Dancing HawkRed-shouldered Hawk

At first, the bird was sitting on top of a dead tree facing into the sun – very harsh light:

Back-lit bird (unprocessed jpg file)

I have many better images of these hawks on my computer. I’m not even sure what made me raise my camera.  Maybe my subconscious was getting ahead of me.

Luckily I did and when the hawk decided to turn around I was ready.  I made a continuous series as it used its wings to balance and I really like the one at the top. The wings are nicely spread and one foot is raised as if it’s dancing.

I’m glad I was shooting in RAW mode – it allowed me to compensate for the harsh light in post processing.  For reference, here is an unprocessed jpg version:

Dancing Hawk (unprocessed jpg)

Processing included using DxO Photo Lab for basic exposure tuning and noise reduction and then tweaking tones, colors, and cropping in Lightroom.

A little luck, a few seconds, and some post-processing can make a huge difference, don’t you think?  It helps to practice and know what’s possible in a situation like this.  Try it  – you might be surprised at the end result.  And maybe your subconscious will start helping you too!

This is a very good time of year to visit Orlando Wetlands.  I saw lots of Spoonbills, a couple of hawks, herons, egrets, ducks, Osprey, Belted Kingfishers, Ibis, a deer, etc.  And it’s cool and pleasant – great for a lovely walk.  You can look at more images from there in this album on Flickr:  https://www.flickr.com/photos/edrosack/albums/72157639616792296

Thanks for stopping by and reading my blog. Now – go make some photos!

©2018, Ed Rosack. All rights reserved

Some Recent Photos

I haven’t been on a photo expedition recently, so this week I’ll cheat a bit and show some images that haven’t been on the blog before.

Orlando WetlandsOrlando Wetlands Park, October 2017. Olympus hi-res, two frame panorama converted to B&W.  I don’t convert sunrise photos to B&W very often, but the light in this one is pretty.

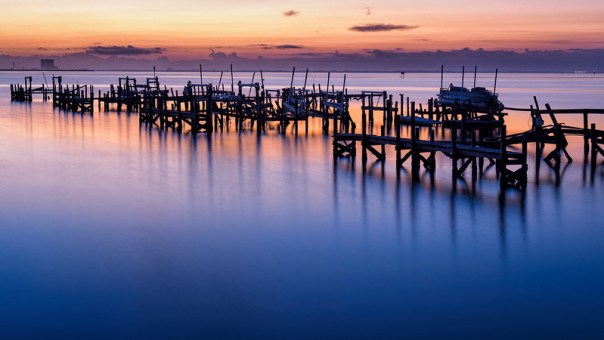
Space View ParkSpace View Park, February 2018. An alternate view to the one posted back then.  Looking east at dawn. You can see the hurricane damage to the dock that hasn’t been repaired. Olympus hi-res, two frame panorama.

Red-winged BlackbirdRed-winged Blackbird, Merritt Island National Wildlife Refuge, December 2017.  Common around here, but those epaulettes are attractive!

A gull and the ocean, 1A gull and the ocean, Cocoa Beach, January 2018. This is also an alternate view to the one posted back then.  I bracketed exposure due to extreme contrast and to get some detail on the bird.  Blended in Photoshop

Please click on any of these to see a larger version on Flickr.  And thanks for stopping by and reading my blog. Now – go make some photos!  I will too!

©2018, Ed Rosack. All rights reserved

Feathered Feeding Frenzy Photo Fun

Once in a while, conditions are just right.  Low water levels force fish into small pools and birds flock to the spot to feed.  When you can get close to a scene like this early in the morning, with soft golden light from the rising sun behind you –  count your blessings!

Great Egret in flightGreat Egret in flight

This happened to me at Merritt Island National Wildlife Refuge a week ago (2/9/18).  I  lucked into seeing a bird feeding frenzy along Black Point Wildlife Drive.  It’s always a treat to watch and photograph these.  I’ve written about them before  (see this post from December of 2012).  Here are some observations. / hints that may help you in a similar situation:

  • The birds all compete for food.  Watch for interactions and squabbles – they can lead to great poses and action shots.
  • Since the birds are very focused on the fish they’re more tolerant of close photographers.  Be quiet and move slowly so you don’t stress them.
  • They’ll be constantly coming and going and moving in the pond.  Watch for good compositions as they shift around.
  • When they fly in, you can often track them as they get closer and land in the pools for some great images.  After a while you’ll be able to anticipate their paths.
  • As the birds land, they’ll be low and close to you – great for eye level BIF photos (BIF = Birds in Flight)!
  • You’ll need to balance zoom level, composition, background, exposure, focus, etc.  And conditions change rapidly.  Set up your camera in advance and be nimble.  I have a BIF preset programmed so I can quickly shift to it when needed.  It shoots at 10 frames / second with continuous focus, large focus area, and higher ISO settings to keep my shutter speed high.  You’ll need  1/1000 sec. exposures (or shorter!) to freeze wing motion.
  • A white bird against a dark background vs. a dark bird against the sky will require exposure compensation adjustments.  I have EC mapped to the rear wheel control so I can easily vary it when needed.
  • Your  “keeper” percentage may be lower than you’re used to.  But there are so many photo opportunities at a feeding frenzy that you’ll likely come home with images you like.  Practice when you can and you’ll get better.

Landing IbisLanding Ibis – I like the composition / background on this one.  But my shutter was too slow to freeze the wings and I didn’t get the exposure compensation right either.  I’m still practicing!

It’s not all about birds in flight.  Interesting groups or poses on the shore or perched on nearby branches are also photogenic.

On the banks of the pondOn the banks of the pond.  I like compositions with multiple species in the frame.

That was a wonderful morning.  I’m glad I was able to see all the action.  Oh, and before the bird activity, I also made a couple of landscape photos:

Dawn at the dock on the Indian RiverDawn at the dock on the Indian River.  Olympus Hi-Res mode.

Florida cloudsFlorida clouds along Black Point Wildlife Drive.  Monochrome infrared.

Thanks for stopping by and reading my blog. Now – go make some photos!

©2018, Ed Rosack. All rights reserved

Blog subscribers restored!

Good afternoon everyone!

You probably missed my post yesterday, where I wrote about both Merritt Island National Wildlife Refuge and my struggle to get the blog back up and running.  That was because the connection between my blog and the Jetpack plugin that manages emailing each post to all my subscribers broke during the move.

I’m happy to report that the awesome Jetpack tech support folks (thanks James!!!) have fixed the issue and all future posts should go out normally.  If you’d like to see yesterday’s, please visit the site or click the link above.

Thanks so much for following my blog.

Ed

Merritt Island & Blog Status

First an announcement:  If you’re here because you didn’t get an email from the blog this week, please see the very last bullet at the bottom of this post.

And for those interested, you can read much more about other blog tech details / status  / news following the Merritt Island photo update.

Merritt Island National Wildlife Refuge

Late Thursday, Kevin K. asked if I wanted to go photographing Friday morning.  I did and we decided to meet early and visit Merritt Island.   We arrived way before sunrise, so we stopped first at the Titusville Municipal Marina for a quick photo in the dark.

Pre-dawn at the marina - TitusvillePre-dawn at the marina – Titusville.  Olympus high res mode, two frame panorama

Next we went by the fishing pier on the North west side of the causeway.  From there you can  shoot through the bridge toward sunrise.  I liked the viewpoint, but I wish the sunrise color had been better.

Dawn through the bridgeDawn through the bridge. Olympus high res mode, two frame panorama

After this we headed to Black Point Wildlife Drive.  There were a lot of birds there and we ended up going around twice.  I was worried that it would be dull and overcast, but we actually had some very pretty light for most of the morning.

Roseate Spoonbil feeding in the shallowsRoseate Spoonbil feeding in the shallows

Hooded Merganser (female)Hooded Merganser (female)

We also saw (among others):  American Robins, Great snowy and Reddish Egrets, Great Blue and Tri-Colored Herons, White and Glossy Ibis, Norther Shoveler and Pintail ducks, Belted Kingfishers, gulls, terns, Osprey, Vultures, and more.  We were hoping to spot some White Pelicans, but didn’t we couldn’t find any on this trip.

Enough of the pleasant content.  Now on to the agonizing stuff.

Blog status  / news

It’s been a very tough week at Central Florida Photo Ops HQ.  Our head of tech support (me) along with Google search, and two different hosting provider customer support lines struggled mightily to get the blog transferred and back up and running again.

There’s good and bad news.  Good news:  The blog is mostly back up.  And the head of tech support probably won’t get fired since there’s no one to replace him.  Bad news:  He’s not getting a raise anytime soon.

I started looking for a new hosting provider over the Christmas break since my agreement with GoDaddy is almost up .  My blog’s been responding a little slow and GoDaddy’s renewal fees  and their SSL (https) offerings were expensive.  And even though Bob Parsons is no longer CEO, there’s the whole GoDaddy Elephant thing.

I did some online research and discovered that inMotion hosting is highly rated and has some inexpensive plans.  Since this is a non-commercial, personal blog, I don’t feel I need a high end hosting plan and decided to go with them.

It was very easy to open an account and purchase their WPS500S plan.  The rest of the process wasn’t as easy.  Here are some of the issues I ran into:

  • Since I purchased a WordPress specific hosting plan, I thought InMotion would automatically install WordPress for me.  They didn’t.  I could have installed it myself through their cPanel interface, but I wasn’t familiar enough with their software and what to expect.  A call to their tech support took care of this right away.
  • Next, I requested that InMotion transfer my content from GoDaddy.  I gave them my login credentials, but for some reason they couldn’t access the old account.  I ended up doing this myself by FTPing into GoDaddy and copying my content files first to my computer (for backup) and then uploading them to InMotion.
  • Next I initiated the domain transfer to move edrosack.com from GoDaddy servers to inMotion servers.  This was probably a timing mistake (see the bullet below about follower migration).  The domain transfer happened relatively quickly and I could see the new edrosack.com on the web.
  • Next I turned on inMotion’s included SSL capability.  This was easy and I now have an https connection.  My blog readers don’t do any business through my site and don’t sign in, so this probably isn’t strictly necessary for them.  But Google factors this into search rankings so it’s good to have.
  • I then went about configuring WordPress to make it match the old installation.  I had lots of problems with the Jetpack plugin.  It turns out that InMotion enables the Mod Security firewall by default and the WPS500 hosting plan doesn’t allow customizing  this.  Jetpack relies on access to the site xmlrpc file to work and Mod Security blocks this by default.  I was able to resolve this with another call to InMotion tech support.
  • Since I was now worried about security on the new site, I spent some time installing firewall / security plugins and testing / configuring them.  In the process, I managed to lock myself out of edrosack.com at least once.  Fortunately, I could still get to the site file system so I could nuke the security software and then reinstall / reconfigure it.  Whew!  It would have been embarrassing to have to call inMotion on my second day with them to get that fixed.
  • Most of my content transferred ok, but I couldn’t get the NexGen gallery plugin  to display my Portfolio without re-setting it and starting over.  In the end, I decided to use the gallery provisions included with Jetpack and re-did my portfolio pages.  I needed to update them anyway and now they reflect some of my more recent work.  Please check them out if you get a chance!
  • And late on Saturday as I was finally getting things fixed, my cable internet here at home went down for the first time in months!  This stuff is just too hard!
  • The final problem (that I know of) and one that I haven’t resolved yet is that since I couldn’t connect WordPress.com to both my old and new providers at the same time, I was  unable to use Jetpack’s  subscriber migration tool. So for now, I’m waiting on Jetpack to respond to a support request.  Once I hear from them, I’ll know how to proceed.  If they can’t re-instate my subscribers, I’ll have to send out an email and request that folks re-subscribe.  Stay tuned on this and I’ll let you know what happens.

Well, that’s much longer than a normal blog post, so I’ll sign off now.

Thanks for stopping by and reading my blog. Now – go make some photos!  And if you’re having issues with your server, don’t call me!

©2018, Ed Rosack. All rights reserved