Tag Archives: equipment

Any Micro 4/3 Camera Regrets?

The short answer is “Nope, not really”.  For the longer answer, read on…

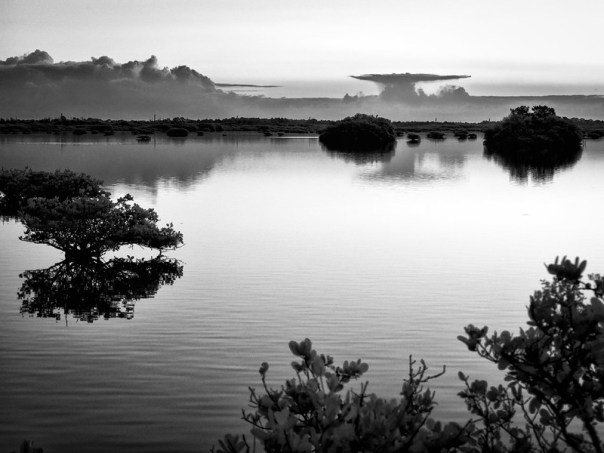
Sometimes I’ll take a camera by Bear Creek Nature Trail in our neighborhood (the middle of Tuscawilla, along the north side of Winter Springs Boulevard).  On this particular day back in January of 2017, sunlight was filtering down through the trees and hitting the water at a bend in the creek.  The light refracting  through ripples in the surface created interesting patterns and colors I thought were worth a shutter click.

Bear Creek ripples 1aBear Creek Ripples 1a  (28mm eq. focal length, f/8, 0.5 seconds, ISO 64)

This was a month or so after I started using the Olympus E-M1 Mark II camera.  I’d sold my Nikon D-800 and lenses so I could afford to upgrade my Olympus kit and I was still getting used to the new gear.  I’d had the D-800 for over four years and it’d worked extremely well for me.  It was the very best camera I’d ever used so getting rid of it was a big step and I was still second guessing my decision.

Why did I sell the Nikon gear and move exclusively to Olympus?  And how is it working out?  Glad you asked!

It seems that discovering micro four thirds cameras is a big thing on the web, lately.  Here are a few links with a lot of information you can investigate:

I won’t repeat these discussions.  Everyone will have their own opinion and reasoning for the camera equipment they use. I’ll just summarize by saying that for me, no regrets.  The smaller and more modern design has many advantages with few real issues.  For what I shoot, I haven’t seen much downside.

I can carry much more camera capability with far less weight.  And the new gear does things the older Nikon equipment doesn’t.  Really, the only thing that concerns me even a bit is star / astro photography with the smaller sensor.  I haven’t had much of a chance to test this yet and hopefully ease my concerns, but even if the Olympus isn’t as good at this type of photography, I’m not very worried.  I don’t do it all that often and if I need to, I can always rent / borrow a different camera with a larger sensor or use something like the iOptron SkyTrackerTM  to make really long exposures. Your mileage may vary of course, and you should investigate thoroughly before you make such a significant change.

If you have questions, feel free to ask in the comments.  I’ll be more than glad to try to answer.  And you can click on the image below to go to Flickr and browse through an album of the images I’ve  made with the new camera:

Great Egret head shotGreat Egret head shot

Thanks for stopping by and reading my blog. Now – no matter the camera you have, go make some photos!

©2017, Ed Rosack. All rights reserved

Three things

Three more or less unrelated things to discuss today…

1. Image Stabilization

I’ve used Olympus micro four thirds cameras for a while and I’ve watched their capabilities get better and better.  Their latest image stabilization is truly amazing – Olympus claims five to six stops.  This means that if you can normally shoot at 1/100 second handheld without inducing camera shake blur, then with IS, you may be able to shoot at 1/3 to 1/2 second.  Truly a huge difference, as long as subject motion blur is not a problem.

Rapidan RiverRapidan River – This is the view just behind President Herbert Hoover’s cabin at the Rapidan camp retreat in the Shenandoah Mountains.

The settings on this photo are: focal length equivalent of 28mm, ISO 64, f/8, at 0.5 seconds, handheld.  Using the (1/focal length) rule of thumb, I should have exposed this at 1/30 sec to prevent camera shake.  But I wanted to use a slower shutter speed to blur the moving water.  With IS turned on in camera, I could hand hold at a half second and still keep all the non-moving rocks, etc. completely sharp in the frame.  And I like the way the water looks.

It’s a nice option to have if you don’t bring your tripod.

2. Workflow Experiments

I recently bought an SSD (solid state device) disk.  The main advantage of these is that they’re faster than spinning hard drives.  I wanted to speed up my photo processing workflow.  So I moved my 2017 image file directory and my Lightroom catalog to this drive and sure enough, Lightroom does seem faster.

But then it occurred to me that when I travel, I can  take the SSD with me on the road and use it with my laptop.  All I have to do is add a folder for the images from the trip.  When I get home I can just move it back to my desktop computer and any work that I’ve done on the road will come across with the SSD.  I won’t have to export / import, etc.  This should definitely save time when I get back.

There are some things to be careful of.  I’m backing up the SSD drive using Apple’s Time Machine in case there are any glitches with the SSD.  And I’ve had to re-arrange the image folders across the different disks and tell Lightroom where everything is.  I also need to make sure that preferences and presets are all accounted for.

After a week or so, it all seems to work ok.  I’ll let you know if I discover any other gotchas.  If you have questions about this setup, leave a comment and I’ll try to answer.

3.  Merritt Island National Wildlife Refuge update

You may remember this blog post from March:  https://edrosack.com/2017/03/19/morning-glory/.  I posted a photo then of cracked mud on the bottom of a dried out pool.

I haven’t been back recently, and when my friend Howard T. wanted to try out a new camera, we decided to see what’s going on over there.  I’m happy to report that the water is back to normal (or even a bit high).  I can’t really recommend it for wildlife photography yet – the birds and animals still seem to mostly be elsewhere.  Maybe they’ll read this blog and return when they find out conditions have improved.

Black Point Wildlife Drive – The drought has eased – there was a lot of water there last week.

Thanks for stopping by and reading my blog. Now – go make some photos!

©2017, Ed Rosack. All rights reserved

Thoughts on Processing Olympus OM-D E-M5 Mark II High Resolution Photos

Introduction

I’ve been using an Olympus E-M5 Mark II for several months and I’ve mentioned it once before (in this post about algorithmic and computational photography).  I very much like the camera and the photos I’ve made with it.  You can see many more images I’ve made with this and other micro 4/3 cameras  this set on Flickr.

Today I’d like to talk more about its high res mode and some things I’ve learned so far while working with it.  I’ll use this recent image from the north bank of Haulover Canal in Merritt Island NWR for my example.  By the way, please click on the photo, you’ll be able to see a higher resolution version on Flickr.

Daybreak at Haulover CanalDaybreak at Haulover Canal

For those of you who aren’t interested in this particular camera or capability, here’s the tl;dr summary:  Your capture and processing tools, technique, and skill make a difference in the resulting photo.  But that’s true of every camera.  And you already knew that, didn’t you?

Okay, for those of you that are interested, here’s some hints on how to get the best out of this mode.

RAW Import

I’ve found that the software I use makes a big difference in the detail that shows up in the file.  I normally use Lightroom for all my photos, although I also have DxO Optics pro and I think it does a good job with higher ISO images.  But I noticed issues when using either of them with the Olympus high-resolution files.  Here are three 1:1 crops, processed in the three different software packages.  These are just after importing from the RAW file, with (mostly) default processing, although I did adjust sharpening on the first two to try to improve detail.

Lightroom Processed

Processed in Lightroom  CC Version 2015.1.1

DxO Processed

Processed in DxO Optics Pro 10 Version 10.4.2 

Olympus Processed

Processed in Olympus High Res Shot Raw File Photoshop Plug-In 

To my eye there’s no question:  the Olympus software does a better job processing the High Res Raw file.  The result is sharper, with more detail – so I’ve switched to using it instead of either Lightroom or DxO Optics Pro for initial input of the high res files.  There are limited adjustments available with it, so after importing the file I usually add an Adobe Camera Raw adjustment layer in Photoshop to help fine tune the highlights, shadows, etc.

Motion Artifacts

You can see artifacts on the water surface in the crops above.  These are from the way the high res files are created.  Each file is composed of 8 separate captures that the camera combines into the high res RAW output file.  So any motion during capture will result in strange-looking distractions.  If your camera is moving, the image will be unusable.  So I use a sturdy tripod, a cable release and / or a shutter delay.  If part of the scene is moving (like water, or wind-blown branches) you’ll see the distracting artifacts in that part of the frame.  For some subjects (e.g. still life) this isn’t a problem – nothing moves.  For landscapes, you’ll need a very calm day or you may want to remove the artifacts in post processing.

If they bother you, there are (at least) a couple of things you can try.  Olympus also saves the first of the 8 frames that it uses to create the RAW file.  You can open this, up-res it, and mask it into the high res version wherever there are artifacts you want to remove.  (Note that you’ll have to rename the normal res file – your software probably won’t recognize the .ORI extension).  And you’ll have carefully process the normal and high res files exactly the same up until the point where you do this so that any color or brightness difference doesn’t show.  And finally, you’ll have to recognize that wherever you do this, the resolution will suffer.

For water surfaces, you can also try applying a motion blur in Photoshop and masking it in to hide the artifacts.  That was easy to do in this photo, since it was a relatively long exposure (1/2 sec.) and the water surface was calm.  Here’s a before and after 1:1 comparison:

Motion Artifacts

Motion Artifacts – prior to removal

Motion Artifact removal

Motion Artifacts – masked out using a motion blur layer in Photoshop 

Other Artifacts?

Olympus outputs 64 Mega Pixel RAW files.  Olympus themselves say there’s not 64MP of information in the file.  It’s more like 40MP, so they downsize their JPG files to 40MP.  When using this mode keep that in mind.

There’s not too much else to worry about, although I have seen some things that look like “hot pixels” in the high res images (2 or less per file).  I’m not sure if that’s what they are and I also don’t see them in normal res files from the camera.  But they are pretty easy to remove with the Healing Brush in Lightroom.  By the way, If anyone else has seen these, I’d be interested in hearing from you.

Red Dot Artifact

High Res “Hot Pixel”

Conclusions

So, the E-M5 Mark II High Res mode:

  • Is most suitable for still life types of images when the camera is mounted on a tripod and nothing is moving.
  • Is best processed from RAW by the Olympus High Res Shot Raw File Photoshop Plug-In – at least with current (August 2015) versions of software.
  • Offers better resolution and improved color and noise characteristics than the normal mode images.
  • Can be used in other situations (e.g. landscapes), but unless the subject is still, you’ll need to deal with motion artifacts.
  • Provides the greatest benefit with better lenses.  Lower quality glass could compromise the output resolution of the system.

If you capture images in high res mode and the artifacts are too difficult to deal with, you can always drop back and use the normal resolution file.  The results will be almost as good for anything except large prints (or pixel peeping).

Have you used a capability like this?  What have you discovered?

Thanks for stopping by and reading my blog. Now – go make some photos!

©2015, Ed Rosack. All rights reserved.

Adding location information (GPS) to your photos

Here comes the sun
Here comes the sun – Sunrays shining through offshore clouds mirrored on calm inshore water.  Merritt Island National Wildlife Refuge. GPS:  28°38’8″ N 80°46’33” W

I’ve been adding Lat/Lon location info to my photos for several years.  It’s helpful to others to see where I made each one.  And I like to look back and see the info too.  If you click on a photo in the blog that I’ve geo-tagged, it’ll display on Flickr with a map showing the location below the photo.

I use Lightroom’s Map module for this.  If I know where I was I can easily drag the photos to that place on the map.  For unfamiliar places, I try to remember to make at least one iPhone photo so I can copy its GPS info to the other photos I make there.   That’s what I did on my recent trip to Acadia National Park and it worked well.  But I want something a bit less manual.

It would be nice if all cameras did this automagically like the iPhone does.  The only other one I have with GPS capability is an Olympus TG-2 underwater camera that I use when kayaking.  Nikon makes an add-on GPS, but it only works with Nikon, you’d have to remember it, not lose it, and it plugs into the remote release socket – so it’s a pain when you’re shooting from a tripod.

I’ve experimented before with using my phone to record GPS tracks.  On our trip to Alaska in 2009, I used an app and later synced the tracks to photos back on my computer.  That was a pain too (the app and software weren’t very reliable).  But it seems I wasn’t paying attention to Lightroom updates since then.  I completely missed that it now has the capability to sync a captured GPX format track to photos in your library.

Screen-Shot-2014-08-29-at-12.01.05-PM

Lightroom Map Module:  The track interface is hidden in a pull down menu at the bottom of the screen. 

Using the interface at the bottom of the Map Module (shown above), you can load a track and use it to auto-tag the location of photos in a folder.  And it works very well!

So how exactly do you do this?  There are three steps:

  1. Before you leave, make sure you set the time in your cameras correctly.  The time stamp is used to sync the position from the GPS track to each photo.
  2. Use your GPS unit or an app on your phone to record a track of your movements.  There are several iPhone apps that will capture the track info.  I tried GeoTagr ($4.99 in the app store) and it worked well.  Motion-X GPS (no longer in the app store?) also works.  When I got back home, I emailed myself the .gpx file with the track information.  One warning:  sometimes these location recording apps can be power hungry.  You might want to check to make sure you don’t run down your battery doing this.
  3. Move the .gpx track file to the folder on your computer with your photos.   Then load it into Lightroom and apply it to the photos.  Easy-peasy!  It all just works!

Two more geo-tagged photos from a quick trip to Merritt Island early last Thursday:

Nearby Mangroves and distant storms
Nearby Mangroves and distant storm.   Merritt Island National Wildlife Refuge. GPS:  28°38’8″ N 80°46’33” W

Morning by the causeway
Morning by the causeway.  Parrish Park. GPS:  28°37’21” N 80°47’45” W

I like this method and I’ll probably use it in the future.  It’s much less fussy than what I tried several years ago.  Now all I have to do is remember to start the app at the beginning of a photo-op.  I wish I’d worked this out before my trip to Maine.  It was an effort to figure out where each of those photos were made.

By the way, MINWR was still quiet last week – not much wildlife or birds about.  I did see a group of White Pelicans there.  Usually, they don’t show up until November.  I’m not sure what that means, but they were fun to watch.

Thanks for stopping by and reading my blog. Now, go make some photos! And geo-tag them!

©2014, Ed Rosack. All rights reserved.

Blog Maintenance (and another camera)

Just a short entry to let you know that I’m working behind the scenes to re-organize Categories and Tags used on the blog.  Since I started writing “Central Florida Photo Ops” in May of 2007 they’ve grown a bit too haphazardly, and now it’s time for me to get organized and efficient.

So I’m restructuring the Categories to serve as a Table of Contents.  The main ones are location-based so that a visitor can quickly see all the entries about a given place.  You can reach the Categories from the pull down widget on the right.

The tags will function like the index in a book.  For instance, when I’m done, you’ll be able to click on “Bird” in the tag cloud on the right and see a listing of all posts that mention various kinds of birds.

I’ve already started working on this, although it’ll take me a while to go through all 236 published posts and update / correct each one.  But as I work on it, it’ll gradually improve and when I’m finished it’ll be better than it was.  As always, comments and suggestions are welcome.

And just so we don’t have a blog entry without a photo, here’s a couple of images of another camera acquisition.  It’s a somewhat well used, Leica IIIc 35mm camera made in the late 1940s.  I need to clean it up a bit, but I’ve already run some film through it and it works pretty well.

Leica IIIc 35mm rangefinder camera
Leica IIIc 35mm rangefinder camera: front view

Leica IIIc 35mm rangefinder camera
Leica IIIc 35mm rangefinder camera: top view

NOTE: Added in Jan. 2021 (and Dec. 2023). This site has a serial number reference for these cameras: https://www.cameraquest.com/ltmnum.htm and shows this one was made in 1946/7. You can find other sites with serial number lookups for both camera and lenses if you search the web (e.g https://reddotcamera.net/leica/serial-number-tool/). My lens is a Summar 50mm f/2, built in  1937.

You can see other photos of collectible cameras in this set on Flickr.

Thanks for stopping by and reading my blog. Now – go make some photos!

©2012, Ed Rosack. All rights reserved.

Wide, wide weekend

I was in Colonial Photo and Hobby and saw a Rokinon micro four thirds  7.5mm f/3.5 manual focus fish-eye lens on the shelf.  I’ve never had a fish-eye lens before although I’ve always liked wide-angle.  I couldn’t resist and ended up taking it home.

Fish-eye lenses are not rectilinear – meaning they sacrifice keeping perspective lines straight to make the field of view big.  This one has a full 180° field of view and covers the sensor without any vignetting.  180° is really, really wide – keep your fingers and toes out of the composition!   They also tend to have a huge depth of field, which is even greater on a micro four thirds camera than on a full frame 35mm equivalent.

I tried it first on my infrared modified camera – I call these IRFE (infrared, fish eye) photos.  In this one, I wanted to take advantage of the distortion introduced by the lens to make the support structure for the bridge look more interesting. So I put the beams as close to the edges of the frame as I could get them.

Suspension bridge
Suspension bridge: Carl Langford Park, Orlando

In this next one, I saw the tree branch above and wanted to try to capture the complexity against the sky.  I’ve found it hard to make photos like this with a regular  wide-angle lens.  I end up not having a wide enough view and then taking multiple photos and trying to stitch them together as a panorama.  Stitching software just doesn’t hold up too well when the angle of view is too large.

Tree branches
Tree branches: Dickson Azalea Park, Orlando

Of course, you can use a fish-eye lens in a more normal way.  If you keep things that you want to appear straight toward the center of the frame, the image will look a lot more like a regular wide-angle photo.

Curve ahead
Curve ahead: Behind Lake Lily Park, Maitland.

I’m really happy with the lens.  It seems sharp, doesn’t vignette and the manual focus aspects aren’t a big bother because of depth of field.  It seems to handle flare pretty well and I’m not noticing any pronounced chromatic aberrations or other problems.  On my camera, it exposes correctly in aperture priority mode, even though there’s no electronic coupling.  And… it’s fun!  Isn’t photography supposed to be fun?

You can click on the images above to get to larger versions on Flickr. You can also see some of my other infrared photos here on Flickr.

Thanks for stopping by and reading my blog. Now – go make some photos!
©2012, Ed Rosack. All rights reserved

Large photo processing

Mullet Lake, Geneva Florida
Dawn at Mullet Lake – Geneva, Florida

With all the large photo files I process (sometimes with multiple layers in Photoshop) my late 2009 iMac has felt a bit slow and crowded.

To solve the disk space problem, I added an OWC Guardian Maximus firewire 2 TB RAID-1 (Mirrored) external disk.  It’s running great, has more space than I need (for now), and since it’s mirrored it should be pretty safe storage.  I also do a periodic complete backup.

To address the speed issue, I doubled the memory in my iMac to 16 GB (also ordered from OWC).  To test it, I put together this panorama. The full size image is 85 mega pixels and the iMac handled it just fine.

I’m happy with the changes and I think I’m set for a while on computer upgrades.  And it wasn’t too painful.

Thanks for stopping by and reading my blog. Now, go make some photos!

©2012, Ed Rosack. All rights reserved.

Digital Infrared Photography – a post processing example

Introduction

If you’ve read through my blog or looked at my photostream on Flickr, you’ll already know that I enjoy black and white photography and occasionally post B&W images. Removing color from a scene abstracts reality – and emphasizes shapes, composition, and texture. The image becomes a bit unreal, but since we’re used to B&W  – not too unreal.  This makes B&W a great way to make your images stand out.

Another way to make your images stand out is by using infrared (IR) film or an IR modified camera:

  • IR captures a portion of the spectrum of light that’s different from what your eyes can see.
  • The spectral response makes blue sky look dark and foliage bright.  This reverses a normal daylight scene’s brightness values, helps tame contrast, and allows you to shoot even when the sun is high in the sky.
  • You can interpret this alternate version of reality by processing your IR photo as B&W or various types of false color images.
  • IR can sometimes also capture details that aren’t seen with visible light.
  • If you use a modified digital camera, you may see improved detail in your photos, since the conversion process removes the anti-aliasing filter that most digital cameras use to slightly blur the image during capture (and remove Moire patterns and other aliasing artifacts).

I’ve gotten some questions about my infra-red images.  And I haven’t written anything about technique recently, so in this post, I’ll go into detail about a recent IR image I made.  I’m relatively inexperienced at this, but as a IR n00b I’ve learned a few things that may come in handy if you want to try it.

Messy knees

Messy knees:  Cypress trees on the south shore of Lake Jesup.  Cypress trees and their roots are good subjects, especially along the water where they’re usually found. The light hitting these tree trunks and the Spanish Moss also caught my eye.  I’m still playing around with infra-red. There’s a range of post processing options available. I was hoping that this false color version looks just alien enough to make people take a second look.  Click here to view a larger version of this photo on Flickr.

Camera

I use an Olympus E-PL1 modified for IR by http://www.lifepixel.com/ and I’m very pleased with the result.

Using a micro 4/3 camera has advantages for IR:

  • Older models like the E-PL1 are relatively inexpensive;
  • They have a large sensor (compared with compact cameras) which helps image quality;
  • They use the sensor for contrast type focusing so there are no focus calibration issues that can occur in a DSLR
  • Most have RAW format capture available

Settings

I shoot in RAW, not jpeg.  For IR, it would be tough to get all the settings perfect in camera.  Plus, there are a lot of post processing options which you’d give up if you only capture jpeg.

White balance is one thing that you should set.  If you shoot in RAW, white balance can be adjusted in post processing.  But setting a white balance in camera is important since it lets you judge your shots on the LCD screen as you take them.  Unless you set a custom (preset) white balance all IR images would look very red. On my E-PL1 I use a temperature setting of 2000K which is as low as it will go.  This camera has no tint adjustment, so photos still look blue, but it’s good enough for judging exposure.

Workflow

Here are 7 versions of this photo that show the processing steps I went through along the way.  Don’t be alarmed – this is quicker and easier than it sounds.

This is the RAW photo straight out of the camera. My custom white balance adjustment isn’t able to completely correct the IR spectrum so there’s a pronounced bluish tint.
This is the image after white balance and levels adjustment in Photoshop. Other initial adjustments in LR or Photoshop may include a bit of noise reduction, lens corrections (if available), cropping / straightening, and spot removal.
In this version, I’ve used several copies of the same scene (shot from a tripod) to smooth the water’s surface and make the trees / knees stand out more.
This version has a Channel Mixer preset adjustment layer (red and blue colors swapped).  Debra Sandige’s IR page (listed in the references below) has  detailed steps on how to do this in Photoshop.
A Hue / Saturation / Brightness adjustment layer was used to modify the Hue in the cyan and blue channels so it looks a bit more natural.
This is after final adjustments in Lightroom: clarity(+47), vibrance (+24), medium contrast tone curve, sharpening with edge mask.  (note: this is the same image as at top of post).
For comparison, a black and white conversion of the final false color image.  I like the false color version better.

References

You can find out more about Infrared photography at these places:

  1. This Wikipedia article has some background information on infrared photography – especially film techniques.
  2. I had my camera converted by LifePixel and was extremely pleased with the result.  They have a huge amount of IR information including tutorials, FAQs, and a blog on their website.
  3. I read and enjoyed Debra Sandige’s recent book about IR photography. She’s very creative and presents a lot of good information.  She has a page on her website with IR information.
  4. Lloyd Chambers also has an intro to infra-red on his site and offers a paid site with more info.
  5. The Khromagery website has several good articles on IR cameras and processing.  They also offer an IR Photoshop action as a free download.

Conclusions?

So, is IR an infatuation? Will I use it for a while and then let it fade away? Will I only bring it out for special photo ops as inspiration? Will it take over my photo life to the exclusion of all other approaches? Who can say? You’ll just have to keep reading my blog and see what happens. Along with me.

You can visit my IR set on Flickr to see more examples of what I’ve done.  What do you think?  Is IR photography something you’d like to explore?

Thanks for stopping by and reading my blog. Now – go make some IR photos!
©2012, Ed Rosack. All rights reserved

[Additional info, added 1/24/2014]:

Rectaflex Italian 35mm SLR Camera

NOTE: I’ve posted updated info about this at this link: https://edrosack.com/2015/12/20/rectaflex-update/


Italian Rectaflex 35mm film camera and lens, front view
Italian Rectaflex 35mm SLR film camera and lens, front view

You don’t see Italian cameras and especially Italian Single Lens Reflex cameras very often.  We inherited this Rectaflex 35mm SLR film camera from Lynn’s Grandfather.  Camerapedia has some information on the brand.  They were introduced in 1949, and the company went out of business by 1955.  It was one of the first SLRs to have a pentaprism.

Italian Rectaflex 35mm film camera and lens, top view
Italian Rectaflex 35mm SLR film camera and lens, top view

Judging by the serial number, this particular one was probably made in 1953 or 4.  It came to us in a leather case with accessories including extra lenses, extension tubes, and a flash unit.

Italian Rectaflex 35mm film camera lenses, extension tubes, cases

Unfortunately, I haven’t been able to run any film through it.  The shutter’s inoperative and repairing it would probably be an expensive custom rebuild job.  But it looks good sitting on the shelf!

I think it’s fascinating to look at these older cameras to see how things worked WBD (way before digital).

Thanks for stopping by and reading my blog. Now – go make some photos!

©2012, Ed Rosack. All rights reserved.

Orlando American Photo Model Shoot Workshop, December 2011

Intro / Description

Well this is a bit different from what I normally photograph and post about.  But to keep learning, it’s good to occasionally stretch your skills, move outside your comfort zone, and try something you haven’t done before.  And as your intrepid Central Florida Photo Ops reporter, I have an obligation to report on more than just the landscape and wildlife opportunities in the Central Florida Area.  Right?

Flavia
Flavia, in color

So last Saturday, I found myself at the American Photo Magazine Model Shoot Workshop at the Marriott World Resort in Orlando, Florida.  The magazine organizes the event, hires models, brings lighting equipment and sets everything up for you.  You just need to show up with your camera and plenty of memory cards.

They also bring in an instructor for the day.  For this session it was New York Photographer Lindsay Adler.  She provided some very good information on lens choice, lighting, posing, and creativity in two different sessions during the day.  She and the other instructors also circulated and offered advice and help while we were shooting.  It’s a great opportunity to learn, especially if you’re not familiar with this kind of photography.

There were 15 different models there.  I’ve included four photos of three of them in this post.  You can see more photos I made (including the other models) in this gallery.  You can also look at other photographers’ images at this link.

Tiffany
Tiffany, in fur

Since I’m normally a Nature & Wildlife photographer, I found it quite fascinating to think about the differences between those genres and Fashion and Model photography:

Nature and Wildlife Photography Fashion and Model Photography
The light is what it is.  You may be able to change it a bit with flash for fill and catch lights. You control the light.  Indoors, you control it completely.
High Dynamic Range is common for landscape photos to control large contrast levels. Since you control the lights, you control the contrast.  HDR isn’t required.
You rarely interact with the subject.  And if you do, you usually scare it off. You must interact with the subject.  Building a rapport and directing the pose is critical.
Very wide (landscape) or very long (wildlife) lenses are favored. Large aperture lenses are favored:  50mm f/1.4, 85mm f/1.4, 70 – 200mm f/2.8
It’s all on you – a one person show. You’ll require a team: models, make up artist, costumes, sets, etc.
Knowledge / experience and persistence are necessary to find good subjects. Portfolio, reputation, and relationships are necessary to find good subjects.
You go to where the subject is. The subject comes to you in a set or studio.
Post processing: Color adjustments, HDR (landscapes), Selective sharpening Post processing:  Color adjustments, Retouching, Selective sharpening

I’m sure I must have missed something.  What else is different about these two types of photography?

Info for Photographers

Photo hints:

At this type of event, everything except you and your camera are provided:  backdrops, lighting (hot lights and soft boxes), sets, models, costumes, makeup, etc.  The instructors will help with light adjustments and offer advice if you’re having any problems.  Flash isn’t recommended, since the lighting is provided and flash will interfere.  It will also be a lot harsher than the large soft box hot lights that are used.

You do need to use a higher ISO setting.  I used ISO 800 almost all day.  I shot with my lens wide open and my exposures ranged around f/2.8 between 1/60 of a second and ~1/320.  A capable high ISO camera will come in very handy as well as a large aperture lens with VR.  The Nikon D700 and 70 – 200 f/2.8 VRII combination worked well for me.  I did have some issues with overexposure.  I don’t know why these scenes were fooling my meter (maybe the dark backgrounds?), but I sometimes had to dial in some negative exposure compensation.  Make sure to check your histogram often.

Flavia
Flavia, in black and white

White balance was tungsten on some sets and daylight on others.  I shot in RAW mode, so I didn’t worry too much about it.  I just set my camera in auto white balance and then corrected it (if needed) in post.  If you shoot in JPG mode, pay attention to the changing white balance.  I overheard a lot of discussion that day from different people about “degrees Kelvin”.

The overall experience sometimes resembled a paparazzi shoot out on a red carpet.  Popular models would attract a crowd of photographers.  Courtesy is very important.  Take your turn and let others have theirs – there was plenty of time for everyone.  It was also fascinating to be one of  the photographers in the crowd and hear shutter clicks sync up when a model changed position or where they were looking.

Tripod/Monopod:  Not recommended – it’s too crowded and would definitely be in everyone’s way – including yours.  It would also slow you down.  The models do move around, so you need to  react quickly to get the compositions you want.

Lenses:

One of the event sponsors was Sigma.  They brought a couple crates of lenses and would let you borrow one for a session.  This is a great chance to try glass that you haven’t used before.  I checked out an 85mm f/1.4 for the first session, but ended up not using it very much.  I wasn’t getting many sharp images even when I stopped it down.  I didn’t have time to diagnose the issue but I think my problem was a combination of very shallow depth of field and blur caused by slower shutter speeds with no VR.   I switched to my 70 – 200 f/2.8 and used it the rest of the day.  It was occasionally a bit long at the 70mm length, but I compensated when needed by taking multiple shots.

Jennifer
Jennifer, in close

Best time to visit:

You’ve missed your chance for this year.  To see when they’re coming back to Orlando, you’ll have to check the American Photo Website.  They told us they’d be posting the 2012 schedule soon.

Other:  I had a great time, but it was a long day.  You’ll be on your feet a great deal of the time, and you’ll be shifting positions often to get a good vantage point.  I was quite tired at the end of the day.

Summary

You can view a higher resolution gallery of other photos I made at the link in the table below.

My Gallery:  https://edrosack.com/APMS
Their Website:  http://www.americanphotomag.com/modelshoot/
Their Contact Info:
apmodelshoot@bonniercorp.com
Central Florida Photo Ops Rating:  A different kind of CFL Photo Op must do!

Thanks for stopping by and reading my blog. Now – go make some photos!
©2011, Ed Rosack. All rights reserved