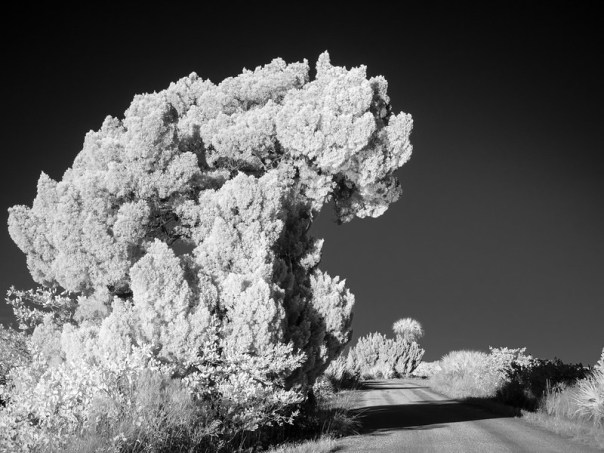
If you’ve looked through this blog or my Flickr stream, you know I like Black and White photography.
B&W with film used to be simple. Get some Tri-X film, put it in your camera, and make exposures. Take the film to the drug store and wait to get your prints back.
OK, it’s never been all that simple. If you’re really hardcore, you get out your chemicals, develop the film yourself and print your best ones. And if you were really, really hardcore – you could dodge and burn while printing to decrease and increase exposure in specific parts of the print.
You can still do all that. But many people today use digital cameras for B&W photography. And things are still as complicated as you want to make them. You set your camera to color mode (yes color, unless you have a Leica M Monochrom camera) and RAW format and make exposures. You load the resulting files into your favorite processing software and adjust / convert the color images to B&W. Then you print carefully to maintain and display all the tonality present in your carefully crafted image.
Along the way, you’ve got to make many decisions on what software to use and how to use it. It’s very easy to get lost and see only trees, no forest. And if you want the best results, you need to know what tools are available and how to use them.

Composing – A recent photo I made and converted to B&W
I purchased and read Monochromatic HDR Photography by Harold Davis. I’ve been a fan of his for a long time and I admire his photographic expertise and creativity. It’s a real treat to read this book and follow along as he makes some absolutely lovely B&W images. He covers info that will help beginners as well as experienced photographers and it’s not just post-processing technique. He also talks about the reasons behind choices and creative aspects.
I won’t give away the whole book. It’s a good one and covers the subject well, with a tremendous amount of information that everyone could use. If you’re interested in B&W, you should buy and read it. Basically, Harold’s work flow consists of:
- Capturing the image as a set of bracketed exposures to make sure you preserve all the tonality that’s present in the scene
- Converting the bracketed sequence into the best quality, color, high dynamic range image possible
- Making multiple passes of B&W conversion on the color HDR file and saving them. With each pass you can vary tonality, contrast, detail, etc. to enhance parts of the image.
- Using layers to blend the different B&W versions into a single “magical” result
I’ve been trying out his ideas and the photo in this post is a recent example. Below are some intermediate steps so you can get an idea of how this works.
 Step 1: I like the general look, but thought the trees should be darker
 Step 2: I like the tree in this version, but the fern, photographer, and parts of the canopy are too dark
 Step 3: Fixing the exposure / contrast of the photographer
 Final: All layers blended together to create the version I posted on Flickr. I like the sky and canopy glow, the dark tree, the bright ferns and the photographer’s appearance compared to the background.
Although I have a long way to go to even get close to Harold’s level, I really like his approach. There are a great many advantages and the only disadvantage I can think of is that it takes time. But if you have a scene that you want to render into the best B&W image possible, this is a great way to do it. And Monochromatic HDR Photography by Harold Davis is a wonderful guide to “Shooting and processing Black & White High Dynamic Range Photos”.
Central Florida Photo Ops Book Review Rating: 5 star, must read!
Thanks for stopping by and reading my blog. Now – go make some photos!
©2014, Ed Rosack. All rights reserved.


