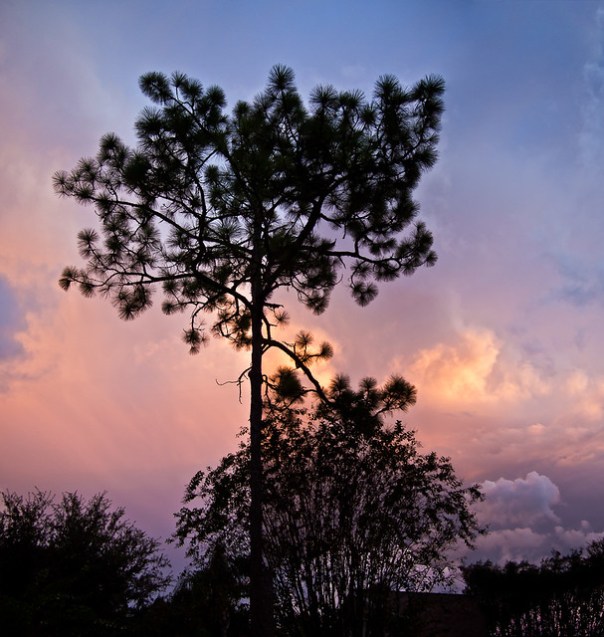
Late Afternoon at Viera Wetlands

Sunset at Viera Wetlands

I’d never been to Viera Wetlands in the late afternoon or for sunset and wanted to see if the activity at that time of day is any different from the mornings when we usually go.  Also, I read yesterday on the Friends of Viera Wetlands blog that several of the winter migrant species (e.g. Belted Kinfishers and Phalaropes) are starting to arrive.   I talked Lynn into going with me by promising her a dinner at the Dixie Crossroads restaurant in Titusville. We headed over in time to get into the restaurant before the huge crowd showed up (about 4:30pm) and then made our way down to Viera.

We went round the Click ponds first, but didn’t see much activity.  The water levels are still low and the road on the east side is pretty grown up.  Next we went into the wetlands.  The new paved entry is nice and you no longer have to drive through the water treatment plant.  There were some of the usual birds around, although I didn’t see any of the migrants.  There was one very tame acting young deer and I was able to get a good close up photo of it.  It must be used to having people around.  I hope it’s more leery of other large animals.

Young deer at Viera Wetlands
Young deer at Viera Wetlands: Check out the eyelashes and whiskers!

An enjoyable photo-op, but it would have been nice to see a Phalarope.

Thanks for stopping by and reading my blog. Now – go make some photos!
©2011, Ed Rosack. All rights reserved

My "New" Olympus Pen Camera

I acquired another “new” camera.  This one is an Olympus Pen FT, from the late 1960s.  These cameras are “half frame” meaning they use standard 35mm film, but make two exposures in the space of a single 35mm frame.  Modern Olympus micro 4/3 digital cameras are also half frame (actually the 4/3 sensor size is ~1/4 of a full frame camera).  You can buy adapters to use lenses like the 40mm f/1.4 that came with this camera on digital 4/3 system cameras.  They’ll be manual focus and there’s no electronic coupling with the body.  But f/1.4 is nice.

Olympus Pen FT camera with Olympus G.Zuiko 40mm f1:1.4 lens

Aside from a few scratches on the body, this camera’s in pretty good shape.  The lens is clear and the focus and diaphragm work correctly.  The body is relatively clean too and the shutter and exposure counter work.  The self timer is a bit dodgy, but that’s OK.  The FT model has a built-in light meter, but it uses a mercury based battery which is supposed to be hard to get in the US.  I haven’t even tried to get a battery, so I don’t know if the meter works or not.  It’s surprisingly heavy (all metal construction) and very well made – it lasted for 45 years so far and still works.  Do you think today’s cameras will still work in 2056?

I did run some black and white film through it.  And I re-discovered that manual focus can be a bit tricky, especially if you shoot at f/1.4 with a relatively dim view finder, like this one.  Here’s a couple of sample images:

Metalwork:  Pen FT, 40mm f1:1.4 lens, Kodak BW400CN film
Metalwork: Pen FT, 40mm f1:1.4 lens, Kodak BW400CN film


Figure, Pen FT, 40mm f1:1.4 lens, Kodak BW400CN film

My first photography teacher – Mr. Dove, had an Olympus Pen.  I don’t remember if it was an F or an FT model.  Someone stole it from him while he was teaching us and he really missed it.  I wonder if he ever recovered it or replaced it.

Thanks for stopping by and reading my blog. Now – go make some photos!
©2011, Ed Rosack. All rights reserved

An HDR photo and some tips

Here’s another photo from our trip last week to the Circle B Bar Reserve:

Sunrise marsh
Sunrise marsh: Early morning at the Circle B Bar Reserve near Lakeland, Florida

The dynamic range of the light in a scene like this is extreme – a perfect opportunity to try your hand at High Dynamic Range (HDR) photography.  I won’t get into the details on how to do HDR.  You can find an excellent tutorial on Trey Ratcliff’s site.  But I wanted to offer a some hints.

  • For sunrise / sunset images such as this, I usually bracket 9 frames at 1 EV apart.  This allows me to capture the very bright sun, details in the sky, and even details in the shadows.  You may want to consider biasing your overall exposure to underexpose slightly since it’s usually the sun’s brightness that is hard to capture.
  • When you process your images, select only the ones you need.  I look at the image and histogram in Lightroom and use that to pick which ones to use.  In this example, I didn’t process the brightest exposures.  The reason for this is that as you use more and more exposures, you increase the chances of introducing noise and ghosting into your final output.
  • If you can afford it, try different software to process your image.  Photoshop, Photomatix, and HDR Efx Pro (and others) all have their strengths and weaknesses and one may work better on any given image than the others.

Thanks for stopping by and reading my blog. Now – go make some photos!
©2011, Ed Rosack. All rights reserved

Circle B Bar Reserve – Summer Sizzle

It’s hot and muggy here in the land of sunshine and the later in the day you go somewhere, the hotter it gets.  This is real motivation to get out early – so Frank and I were on the road at 5:30 am yesterday to drive over to the Circle B Bar Reserve near Lakeland, Florida in time to catch the sunrise.  I’m not sure what these flowers are, but I really like how they almost match the color of the horizon:

Misty Sunrise Flower
Misty Sunrise Flower; 9 bracket capture processed with Nik HDR Efex Pro

We saw a lot of the usual wildlife:  Limpkins (one with a very large, fist sized snail!), Great Blue Herons, Egrets, Little Blue Herons, Moorhens, Grebes, many Woodstorks (especially in trees) – including some juveniles, a Bald Eagle, quite a few Ospreys, several Hawks,  and of course a few Alligators (mostly in Lake Hancock).  This Great Blue was posing in front of some Spanish Moss.  I wanted to do something a little different, so I converted it to Black and White.  It makes it much more of an abstract composition:

Great Blue Heron on one leg with Spanish Moss
Great Blue Heron on one leg with Spanish Moss; B&W conversion with Nik Silver Efex Pro

All in all another good visit, but by the time we left it was very warm.  I’d like to share some tips with you for this kind of weather.  When you travel somewhere in your air-conditioned car and take your cool camera gear out into an environment like this, your lens and eyepiece are very likely to fog up.  Try these things to minimize the issue:

  • Keep your gear packed up while inside the car to insulate it from the cold.  It will be much worse if your camera is sitting on the seat by you right in the A/C blast zone as you drive
  • Consider running the A/C at a higher temp on your way over so the gear doesn’t get so cold
  • Try to arrive a few minutes early to give your gear time to warm up
  • Take a lens cloth with you
  • If you have a filter on the front of your lens, you can remove it when it fogs and get the next shot before the front element fogs up
  • The smaller your gear, the quicker it will warm up and stop fogging.  If your big DSLR glass fogs, pull your point and shoot out of your pocket and keep going.

You can read what else I’ve written about the Circle B Bar here.  And you can view photos I’ve posted from this great place in this set on Flickr.

Thanks for stopping by and reading my blog. Now – go make some photos!
©2011, Ed Rosack. All rights reserved

Hot Tuna at the Plaza

I’ve been a fan of Jorma Kaukonen for a long time.   His band (Hot Tuna) was in town last night at the Plaza Theater and I went to see him.  Here’s a couple of photos:

Jack Casady, Jorma Kaukonen, Barry Mitterhoff
Hot Tuna: Jack Casady, Jorma Kaukonen, and Barry Mitterhoff at the Plaza Theater in Orlando, Florida. August 4th, 2011

Jorma Kaukonen and Barry Mitterhoff
Jorma Kaukonen, and Barry Mitterhoff at the Plaza Theater in Orlando, Florida. August 4th, 2011

If you live in Orlando and haven’t checked out the Plaza, do so.  It’s a great venue:  nice sound and maybe a photo op or two.

Thanks for stopping by and reading my blog. Now – go make some photos!
©2011, Ed Rosack. All rights reserved

Summer Blahs

July in Central Florida is a tough time for photo-ops, especially nature and wildlife photo-ops. The bird breeding season is over, and the heat makes both human and animal activity brief and difficult.

A few of us did scout Lake Woodruff National Wildlife Refuge last weekend.  It’s supposed to have the largest summer gathering of Swallowtail Kites in the Southeast US.  They spend July and August there while they prepare to  migrate to Brazil.  We didn’t see any.  We’ll try again and I’ll put together a better scouting report.

Birdless, misty morning
Lake Woodruff National Wildlife Refuge: Birdless, misty morning

I did manage to make a couple of photos around my neighborhood last week.  This one is from Tuesday.  I noticed these awesome rain clouds on my way home from work and stopped by a small park on the south shore of Lake Jesup to photograph them.

Might Rain
Might Rain: Looking north from the south shore of Lake Jesup

And this is a photo of one of our neighborhood eagles.  We’ve seen it sitting in this tree on many mornings this year.

Neighborhood Bald Eagle
Neighborhood Bald Eagle:  It always amazes me when I see one of these in the wild.  What a remarkable comeback they’ve had from near extinction.

So there you have it.  My photo life this week.

Thanks for stopping by and reading my blog. Now – go make some photos!
©2011, Ed Rosack. All rights reserved

Before and After, Again

This is another entry in my occasional series on reprocessing photos. You can see the other posts here, here, and here. You can also read the original blog post about this image here.

Post-processing skills as well as taste develop over time. New tools come out or get updated.  Reviewing your image library for things you may want to change is a good idea.  Just don’t spend too much time on post processing – leave enough to go out and make new images too!

This is one of my favorite photographs and one that I’ve even sold, but re-looking at it I saw several things I thought I could make a little better.  Here’s the updated version after all my re-edits (which are described below):

Ponce Inlet light, sunset, bird (re-do)

After: Ponce Inlet lighthouse, sunset, bird, Final Edit

I started over from the RAW file (you do save your RAW files, don’t you?) and re-did the basic adjustments in Lightroom (color balance, initial exposure adjustments).  Then I moved into Photoshop and cleaned up distracting elements (tire tracks, poles, the tip of the cloud just right of the lighthouse, …).  I then added a duplicate layer and ran that through Topaz Adjust using the “Spicify” preset to bring up structure, detail, and color saturation.  I don’t usually like applying this filter all over an image at 100%, so once back in Photoshop I added a hide all layer mask and partially painted in the  effect, using a higher opacity brush for the sky to let more of the filter show and a lower one for the rocks and ocean to mute the filter effect.  I then took the result  back to Lightroom for final tweaks to color balance, sharpening and a crop to remove part of the sky.  I thought that the colors of the sky and rocks were still a little off, so as one last tweak I added graduated filters to help adjust their tints.

For reference purposes, here’s the old edit of this photo:

Ponce Inlet lighthouse, sunset, bird

Before: Ponce Inlet lighthouse, sunset, bird, Initial Edit

Note:  you can click the two versions above to go to my Flickr account, where you can view larger versions.

And also for reference, I uploaded the original RAW file (with default development settings in Lightroom) below.

Ponce Inlet lighthouse, sunset, bird, RAW Capture

Would I go to this much effort for every image?  No.  But sometimes a photo really appeals to me and I want to get the absolute best I can from it.  It helps that I enjoy working in Photoshop and learning about new techniques.

So what do you think?  Quite a few changes, some more subtle than others – but overall I like the new version better.

Thanks for stopping by and reading my blog. Now – go make some photos!
©2011, Ed Rosack. All rights reserved

Viera Wetlands Reconnaissance

The woman I’m with is wonderful!  I thought I used up all my husband points yesterday when she went to see Harry Potter with me.  But this morning, she nudged me and asked if we were still going birding.  So we did.

I’ve been to Viera Wetlands many times since first discovering it in January of 2010.  It’s one of the most consistent places for birding in Central Florida.  Today was no exception.  We went by the Click Ponds first.  The interesting thing was that the water level was very low.  We saw a huge number of fish concentrated in small areas in the ponds.  The birds gathered around the fish feasting on them.  Many of the birds seemed sated and were too full to be interested in more.

We saw Black-necked Stilts, Roseate Spoonbills, Ospreys, Red-winged Blackbirds, Great Egrets, Limpkins, Wood Storks, Great Blue Herons, Tri-colored Herons, Little Blue Herons, Snowy Egrets, Little Egrets, Moorhens, Whistling Ducks, Anhingas, Cormorants, Coots, and other species.  You can see a lot of them in this photo:

Many birds
Click Pond Pano: The water level is low in the Click ponds at Viera Wetlands. This has concentrated the fish and the birds are feasting.

Osprey in flight
Osprey in flight

Lesson learned: Don’t ignore the Click ponds at Viera Wetlands. Especially at this time of year.

See my other posts about Viera Wetlands here.  View my other photos from Viera Wetlands in this Flickr set.

Thanks for stopping by and reading my blog. Now – go make some photos!
©2011, Ed Rosack. All rights reserved

Mount Evans Redux

I’ve been to Mount Evans before and written about it here.  I got a chance to go back this week and my second visit was as good as the first.  Maybe even better, since I showed this wonderful place off to Sara, Mike, and Julie.

The highest paved road in North America starts in Idaho Springs, Colorado and winds for 28 miles around tight switchbacks to an altitude of just over 14,100 feet.  There’s a small parking lot near the summit, and a short (but vertical) hike to the very top at 14,270 feet.  The road is quite narrow in spots, and is exciting or scary depending on your attitude and its altitude / slope.  There are many places to pull over that offer outstanding views of the surrounding landscapes and wildlife.

Bristlecone pine
Bristlecone pine:  This species of tree is the longest lived single organism on earth

Take I-70 west from Denver and exit at County Road 103.  The first half of the drive from there is pretty but not too out of the ordinary.  The fee station is around the halfway point, and this is where most of the excitement begins. Pick up a brochure so you’ll have a map and information about the park.

Both times I’ve gone have been in early July so I can’t say much about the rest of the year.  Try to visit on a weekday to avoid crowds, and if you can’t go on a weekday – leave early.  The only day we could drive up was the 4th, so we left around 7am.  When we asked the ranger at the fee station, he said it wasn’t crowded yet but would be, and recommended we go up to the top and stop at places on the way down.  If you don’t, you might not get a parking spot – they get very limited at the top as the day goes on.  We saw lots of cars headed up as we were leaving.

Wildflowers are abundant in July.  Even above 14,000 feet where the terrain seems barren – you can see flowers in between the rocks.  July is also a great time to view wildlife.  On this trip we saw a Deer, Chipmunks, Elk, Mountain Goats,  Marmots, and a Pika.

Baby mountain goat
Baby mountain goat –  There were several families of mountain goats near the summit.  This little one posed for me so I could frame him against the out of focus mountains in the background.  It’s amazing to watch them scramble from rock to rock and never slip.

Pair of Marmots
Pair of Marmots

At the summit, the average summer temperature is ~44 degrees (F) and the average wind is ~30 mph, so we were particularly blessed with a low temp of 55 and very calm winds.  The winds were so calm that on the way down we decided to stop and hike to a couple of pools of water, hoping for a photo of the clouds reflecting in the ice melt.  It seemed like a really short hike downhill from the road to this pool.  When we turned around to go back uphill, the car looked really, really tiny and far, far away.

Catch pool reflection
Catch pool reflection and Mike admiring the view

If you’re ever in the Denver area, you just have to visit Mount Evans.  It’s spectacular and very accessible.  Flatlanders like me shouldn’t do the trip on their first day at altitude.  I’m not in the best of shape and at 14,000 feet I found I was out of breath even after short walks.  A few days to acclimate at around 5000 feet may have helped.

Click on any of the photos above to go to Flickr where you can see a larger version.  You can see the rest of my Mount Evans photos from this trip here, and you can see photos from my earlier trip here.

Thanks for stopping by and reading my blog. Now – go make some photos!
©2011, Ed Rosack. All rights reserved

Comparing landscape and wildlife photography

I enjoy both nature/landscape photography and wildlife photography. I was thinking about this recently and it occurred to me that these can be quite different from an equipment, skills, and approach perspective.

Lake Jesup flood waters after Tropical Storm Fay
Landscape: Lake Jesup flood waters after Tropical Storm Fay

Great Blue Heron profileBirding: Great Blue Heron profile

Here are some of the things I think are different about the two:

Landscapes Birding / Wildlife
The quality of light is important (e.g. “Golden hour”). The amount of light isn’t too important: You can make long exposures from your tripod. The amount of light is important. You need lots of light to get your shutter speed up.
You need to know the location, and figure out sun timing and position.  May still be hit or miss depending on the weather. You need to know about the animal and its habits, and where you might find them.  May still be hit or miss depending on the animals (and maybe the weather).
1. Composition, 2. Exposure, 3. Focus 1. Focus, 2. Exposure, 3. Composition
Probably better by yourself:   Your location, your vision. Can be better in groups.  Many eyes can help spot things one person will miss.
Good tripod with good ball head.  Wide angle lens, small aperture for greater depth of field, long exposure.  Frame rate not too important. Very long lens, large aperture for a fast shutter speed. High frame rate body.  Maybe a tripod with a gimbal head.
Not as expensive Can be very expensive
HDR no HDR

Have I missed anything?  What else is different about these two types of photography?

Thanks for stopping by and reading my blog. Now – go make some photos!
©2011, Ed Rosack. All rights reserved