Category Archives: Technique

Olympus and focus bracketing

I’ve written before about computational photography and focus bracketing / stacking.    And if you’re curious, you can find much more info on the web.

Today’s post is inspired by a gift the Olympus Camera Company has just given to owners of their OM-D E-M5 Mark II and E-M1 cameras.  They’ve issued free firmware updates that add new capabilities, one of which is focus bracketing.  Here’s an example image I made while learning about the new features.  I wanted all the orchids sharp and the background to stay blurry.

OrchidsOrchid – a focus stacked image processed in Photoshop from 14 frames made with the new focus bracketing feature in the E-M5 Mark II.  Individual frames are at ISO 200, f/4, 1/25 second, 60mm (120mm eq.).

You can read about the firmware updates at this link on the Olympus website (sorry – no longer available).

There are several camera companies providing new features in firmware updates to existing cameras.  The Olympus engineering team is exceedingly clever and seem to really enjoy exploiting their hardware to come up with novel features, many of which are computational in nature.    Focus bracketing is the latest example.  Here are my first thoughts about this mode:

  • Of course, you can focus bracket manually, but having the camera do it for you is a big help.
  • When you frame your composition, leave room to crop.  The stacking process can introduce anomalies at the edges.
  • Your starting focus point should be on the closest area.  The bracketing function will step the focus away from the camera.
  • You control the number of exposures and relative step size.  The step size you use depends on the situation and you’ll have to use trial and error to set it until you gain some experience.  If your step size is too great, it’ll leave blurred areas in the processed image.
  • Set the number of exposures greater than you think you’ll need.  Once you look at them on the computer you can discard any unnecessary ones.  You can get very good control of depth of field and background blur by selecting which frames to use when post processing.
  • Focus bracketing uses the camera’s electronic shutter, so there are some limitations from that (e.g. flickering / banding due to fluorescent lights;  An 8 sec. longest shutter speed limit; others?)
  • As with many kinds of multi-frame computational images, subject or camera motion will introduce artifacts.  Focus bracketing works best for stationary subjects with your camera on a tripod

Here’s another example.  And yes, including this may give you some idea of how old I am – I’m old enough not to care about that.

My engineering school calculator
My engineering school calculator – a focus stacked image processed in Photoshop from 21 frames.  Individual frames are at ISO 200, f/4, 1/40 second, 60mm (120mm eq.).

For comparison purposes, here is a single frame from the series.  You can see the tremendous difference in depth of field.

Testing the new focus bracketing feature in the OMD EM5 MII. It works well - big thumbs up to Olympus for putting out this free firmware update. This is a single frame. It works well - big thumbs up to Olympus for putting out this free firmware update.
My engineering school calculator – single image

I have more focus stacked images in this album on Flickr.

I’m very pleased with how well this works.  Olympus deserves a big thumbs up for putting out this update for free.  Doing things like this can earn a lot of customer loyalty.

Now if we could only combine it in camera with other computational photography tricks:  focus stacking, plus high res mode, plus HDR, plus … maybe next time.

Thanks for stopping by and reading my blog.  Now – go compute some photos!

©2015, Ed Rosack. All rights reserved.

Prowling Egret Composite

This is a five frame composite B&W image of a single Reddish Egret patrolling a small pool of water at the Merritt Island National Wildlife Refuge.

Prowling Egret
Prowling Egret

There was some interest in how I did this and it’s relatively simple, so I thought I’d show you the steps.

To start with, the light was very strong, so I overexposed to get details in the bird and this washed out the water / background.  I’d made several frames, so I processed all of them identically in Lightroom to force the background further to white and then loaded them into layers in Photoshop. 1

I selected all the layers and set their blend modes to “Darken” which forces only the darkest parts of each frame to show through.  This is a key step – with the right background, the blend mode does all the work and you don’t have to do any selection / cutting / pasting.2I made the canvas larger so I had room to work:3

Then I used the move tool (top of the tool bar) and selected each layer so I could place them:

4

Once I moved them to where I thought they looked good, I use curve adjustments on each layer to reduce brightness differences and followed with the clone tool to smooth a few remaining variations.  After cropping out the extra canvas, and adding a bit of clarity to the bird shapes I was ready to return to Lightroom.

5

In Lightroom I finished tweaking it (white and black points, sharpening, vignette, etc), converted to Black and White “and Bob’s your uncle“.

I’m sure there are other ways to do this, but I found this method easy enough.  If you have any questions, please let me know in the comments.  And if you’ve tried anything like this, I’d love to see your images.

Thanks for stopping by and reading my blog. Now – go make some photos!  And maybe some composites too!

©2015, Ed Rosack. All rights reserved.

Blue Moon and Sunrise at Ponce Inlet

I met Tom M. at Ponce Inlet last Friday at dawn.  We arrived at 6 am when the park opened and were the first ones in.  We didn’t see anyone else for about 30 minutes.  I was surprised by how few people were there.  I guess it helps to go during the week instead of on weekends.

I thought I’d share three photos along with some details on how I made them.

The moon was full on Friday for the second time in July and was just setting as we got out on the jetty.  I found this vantage point to highlight the “Blue Moon” over the water along the rocks.  This is a two exposure composite that I blended manually using layers and masks in Photoshop.  I exposed the top part for the moon (ISO 50, f/11, 1.6 sec.) and  the bottom part for the water (ISO 50, f/11, 5 sec.).  I used my Nikon 24 – 120mm f/4 lens at 120mm – it’s very versatile for these kinds of outings.

Blue Moon decendsBlue Moon descends

I liked the way the area just north of the jetty looked, with the sun and clouds above the water and rocks.  I made a few exposures, and then waited for the sun to rise a bit more so it would be behind the clouds and the light would be less harsh.  I saw a pelican flying by and managed to catch it just about under the sun (52 mm, ISO 100, f/11, 1/100 sec.).  I thought it would look better with silky smooth water, so I made one more exposure using an 8 2/3 stop Neutral Density filter to slow my shutter speed (52 mm, ISO 100, f/11, 8 sec.).  This image was also blended manually using layers in Photoshop.  I did have some issues with color balance.  The ND filter added a yellowish tint to the bottom that the top didn’t have.  So I adjusted it to match as closely as I could before blending.

Ponce SunrisePonce Sunrise – Early morning, just north of the jetty at Ponce Inlet.

For comparison, here is one of the photos I made about 5 minutes earlier when the sun was lower.  This is a single exposure (50 mm, ISO 100, f/11, 1/100 sec.).  I made a burst of several and picked one that best showed the sun highlighting the spray on top of the breaking wave.  I like the framing on this one better too as I can see the sun reflecting off the jetty wall.  The colors are more orange since there’s more of the sun showing through the clouds.

Ponce Sunrise too
Ponce Sunrise too – Same place as the previous photo, and a few minutes earlier.

I’m not sure which one of these sunrise images I like best.  I’m leaning toward the second one.  Too bad the Pelican wasn’t in place when the wave broke!  Which one do you like?  Have you tried any techniques like this?

On a side note, I used my Nikon D800 camera that I’ve had for more than three years to make these.  A couple of weeks ago, Nikon sent me an email and offered to clean and inspect it and fix anything they found wrong – for free!  I took advantage of the offer, got it back, and was anxious to test it out.  It seems to work fine and it’s nice to know it’s still in good shape.  Thanks Nikon!

You can see more images from Ponce Inlet in this set on Flickr.  Thanks for stopping by and reading my blog. Now – go make some photos!  And do it more often than “once in a blue moon”!

©2015, Ed Rosack. All rights reserved.

Explore and discover – then react

Some photographers plan their photo ops in detail.  In many cases that’s a good approach. Portrait and wedding photography are genres that need advanced planning.  And if you’re going on a once in a lifetime trip, planning is prudent.  Other genres are more reactive (e.g. photo journalism).

I try to do research and planning if I’m going somewhere I haven’t been, but I don’t plan most of my photography.  Especially if I’ve been to a place before, my approach is to explore and discover, and then react to what I find.  Often, I end up with photos that I never imagine when I start out.  Which is loads of fun!

A few weeks ago, I went over to the Sanford Marina to make sunrise photos.  I arrived early and discovered very calm conditions in the harbor.  I reacted with this photo.  It’s nothing like the sunrise I originally went looking for.

Still water, sailboats, and starsStill water, sailboats, and stars – Very early and very calm at the Sanford marina

Last week, I took a ride here in Central Florida along Maytown Road between Osteen and Oak Hill.  It goes through some very undeveloped areas and ends at Seminole Rest, a small park in the Canaveral National Seashore.  In this case, I hadn’t really planned for any photos.  I was just driving to see what’s there.  I was glad to discover this gnarled old tree, although I wish I’d found a little better light to go with it.

Weathered TreeWeathered Tree – Seminole Rest, Canaveral National Seashore in Oak Hill, Florida

This last photo is from back in 2013.  It sat in my archives until this week when I discovered it again and processed it.  It took a while for me to complete my reaction to the scene.

Sun and shadowsSun and shadows – Long exposure under the pier at Cocoa Beach

The photo and video in last week’s post also resulted from the “explore, discover, react” approach.

So what’s the moral of this story?  I suppose it’s this:  If you approach photography like I do, you’d better be ready to react to a scene when you see it.  Know your equipment so you can capture what you need when you discover something.  Even in the dark or in rapidly changing situations.  Know your software capabilities too, so you understand what you need to capture.  Be ready for the opportunities that you find, and the ones that find you.


On a different subject, I realized after I published last week’s blog that embedded video isn’t included in the email.  The Jetpack plugin software that I use doesn’t even put in a link to it.  So if you read the blog only via email and wondered what the video was about, you can click here to view it on YouTube.   And you can always click on the title of the post inside the email to view it on the web.  Sorry for any confusion.


Thanks for stopping by and reading my blog. Now – go exploring – and make some photos!

©2015, Ed Rosack. All rights reserved.

A couple of photo hints and a Gatorland update

It’s been a while since I’ve discussed any photo techniques, so I thought I’d share two hints that you might not have tried recently.  I also wanted to let you know what’s going on at Gatorland now that breeding season is in full swing.

Photo Hints:

#1 – Focus stacking:  I’ve written about this before. You can read the posts here:

Both of those were macro-photography related.  But the technique can also be used for other situations such as landscapes.

Beneath the bridge, by the rocks
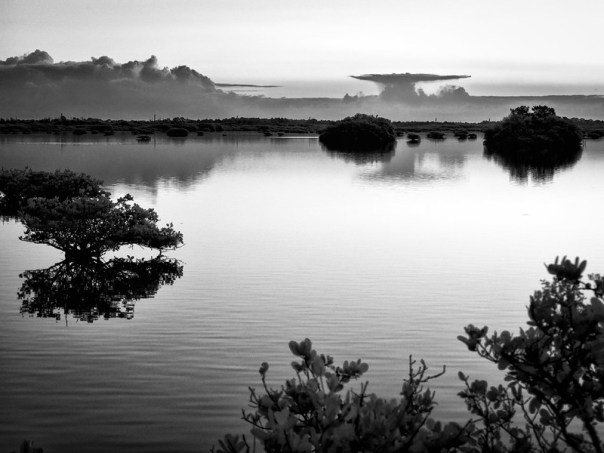
Beneath the bridge, by the rocks – Parish Park in Titusville, about a half hour before sunrise

I was at Parish Park in Titusville one morning, looking for a new view point and discovered this area where I could place these rocks in the scene as a foreground for the bridge and far shore.  My problem was that without a tilt-shift lens, using the Scheimpflug principle, it’s  hard to get the entire composition in focus.

I decided to make three exposures, changing the focus point in each.  In the first, I focused on the rocks in the foreground, in the second on the nearest portion of the bridge, and the last was on the far shore.  At home, I did some initial processing (the same for all three) and brought them into Photoshop on separate layers.  Then I aligned the layers and manually blended them together using masks.  I could have used Photoshop’s focus stacking capability, but doing this myself with layers gave me more control.  The resulting depth of field is just how I wanted it.  What do you think?

#2 – Fill flash:  I often carry my flash and use it to add fill light or catch lights in eyes.  It helps and doesn’t seem to bother the animals.  I’ve also used fill flash for sunrise or sunset portraits of people.  It can do a good job of balancing the exposure of your subject against a bright background.

When I saw this Tri-colored Heron posing in the bush, I made a few photos.  But then I thought about adding flash.  When I got home, the photos with the flash looked much better.  The bright, ambient sunrise was balanced with the fill flash on the nearby bird.  There’s a better detail in the bird when I used the flash.

Early birdEarly bird – Tri-colored Heron at dawn (ISO 800, f/5.0, 1/320 sec, on camera flash in auto slow sync mode, -1 stop flash exposure compensation).

If you try this, you’ll need to practice a bit before you use it in a pressure situation.  Make sure you know how to adjust exposure compensation (on both the flash and the camera), shutter speed, and aperture to get the best results.  And if your camera has it, try enabling high-speed sync.  This lets you shoot with flash at higher shutter speeds without getting any black bands on your photos (at the expense of a lower light output).

Gatorland Update:

I went by Gatorland again last week.  The Great Egrets continue to breed and their hatched chicks are growing fast.  There are Snowy Egrets and Cormorants on eggs now and I saw  Tri-colored Herons, Anhingas, and Wood Storks gathering nesting material although I didn’t spot their nest or eggs yet.  A few cattle egrets have also arrived and are courting.  And the gators are getting more active too.

Just before I left, I spotted this large turtle there – I’ve never seen one before.  It looks quite intimidating and I wouldn’t want to be too close to it in the water.

Alligator Snapping Turtle (?)Alligator Snapping Turtle

For a better idea of what you can photograph at Gatorland, you can look through my album on Flickr.

Thanks for stopping by and reading my blog. Now – go make some photos!

©2015, Ed Rosack. All rights reserved.

Cruise Ship Photo Experiments

We went on a family cruise to the Bahamas during Thanksgiving week aboard the MS Carnival Liberty, out of Port Canaveral.  It was a large group with Lynn and I, Mary, Mike and Sara, Julie, and Nancy and Howard all along for a wonderful vacation.  Except for wind and current on the day we were supposed to visit Half Moon Cay, the weather was nice.  And the food was delicious and plentiful and the company was delightful too!  We had a great time!

It was a family vacation, but of course I brought along a camera (or two, or three) and I made some photos on the trip.  I’ve written about cruise ship photography before (see Cruise Ship Photography Ops and Christmas Time Cruising).  In this new post, I’d like to tell you about some techniques I tried on this cruise.  It’s fun to experiment and I thought you might be interested in how they turned out.  Here are three photos and some background on how I made them.

1.  Long exposure photography from a moving ship

I’ve wanted to try something like this on earlier cruises, but never have.  Long exposures can add interest to a photo and make it look very different from most tourist snapshots.  But usually, you lock your camera down on a stable tripod and only some things in the scene (e.g. water, clouds) are moving.  On a ship, I was worried that everything is moving.  If I tried to use my tripod for a sunrise for instance, the sun might be unacceptably blurred due to the motion.    But I made it work for this photo by composing with the ship as the subject and using it to fill the foreground.  Since the ship doesn’t move relative to my camera, it’s very sharp.  The horizon and the other ship are far enough away so that any motion blur isn’t a problem.  And with a four-second exposure, the water and clouds take on a dreamy look that I like.

The view aft, before dawn
The view aft, before dawn.  (21mm eq. field of view, f/8, 4 seconds at ISO 200)

2. Stitched panoramas from a moving ship:

Panoramas are also problematic from a moving ship.  The change in the camera’s position between frames can lead to issues when stitching frames together, especially if you use automatic stitching software.  For this photo, I made two frames.  Instead of using automatic stitching, I loaded the frames into layers in Photoshop and selected Edit -> Auto Align Layers.  Then I manually blended them using layer masks and was able to use the natural seam along the right hand side of the breakwater as the line between the images.  Since not much overlaps there except water, I could hide any perspective shift stitching errors.

Nassau Light
Nassau Light – Leaving port late in the day.  (f/2.8, 1/100 second at ISO 125.  70mm eq. focal length, two vertical frames, stitched panorama, hand-held)

3. Low light photos without a tripod

And finally, here is another stitched panorama.  In this one, the ship was moving very slowly, so I probably could have used a tripod.  But – I didn’t have it with me!  Bad Ed!  So instead, I upped my ISO, and opened my aperture so that I could shoot hand-held.  Even though the pre-dawn light was dim, I was still able to make a super wide image consisting of 9 vertical frames showing our arrival back at Port Canaveral.

Pre-dawn arrival in Port Canaveral
Pre-dawn arrival in Port Canaveral.  (f/1.8, 1/50 second at ISO 1000.  24mm eq. focal length, nine vertical frames, hand-held, stitched panorama)

So that’s how I got these three shots.  Photography is an interesting pursuit.  Creativity helps – and not just with subject, composition, etc., but also with technique.  Now I know these descriptions aren’t very detailed, but maybe they’ll give you an idea or two to try for yourself.  If you want more information, please feel free to ask in the comments.  I’d be happy to answer questions.

You can find larger versions of these photos on Flickr (just click the image).  And more photos from this cruise are in this set:

Thanks for stopping by and reading my blog. Now – go make some cruise ship photos!
©2014, Ed Rosack. All rights reserved.

Downtown Orlando

I seem to have a preference for wide views.  Hence my attraction to stitched multi-frame panorama images.  They’re a great way to extend the field of view of lenses you have with you.

Keith H. and I walked around downtown Orlando for a few hours one day last week.  I made a lot of photos, and after getting home and reviewing them, my favorites all turned out to be stitched panoramas.  I guess I just enjoy being able to see the whole scene.  Here are three examples:

Back alley break
Back alley break – A woman takes a work break on the back stairs. 4 frame panorama

Also, I hardly ever make selfies, but on this walk I ended up with two that I like – although they aren’t typical of the genre.

A selfie
A window selfie – Looking south across Church Street from the 4th floor of the Plaza parking garage. That’s my reflection in the glass towards the middle bottom. Infra Red, Black & White, 4 frame panorama.  (Click for a larger view on Flickr)

And this next one isn’t a Black & White photo – the sidewalk and wall were that color.

Cracks me up
Cracks me up – A shadow selfie. 3 frame panorama.

You might find you like stitching panoramas too.  I’ve written about them before.  This article has a detailed workflow example and there are some more ideas in this post.  Composition can be difficult since you can’t see the final image through your viewfinder as you capture it.  Try to cover a larger area than you think you’ll need so you can crop into the assembled image to fine tune the composition.  And watch out for long lines and patterns of lines.   Look for any errors / mismatched lines between frames after you stitch them together and clean them up with the clone tool.

Besides downtown itself, there are several areas in Orlando with interesting photo ops: the Plaza Theatre, Leu Gardens, Lake Eola, Meade Gardens, and Greenwood Cemetery.  I’ve collected photos from all of them in this set on Flickr.

Thanks for stopping by and reading my blog. Now – go make some photos!
©2014, Ed Rosack. All rights reserved.

Regarding image selection

Sometimes it’s obvious that an image is good the first time you look at it.  With others, it can be difficult to visualize what they’ll look like after processing.

If you use raw format in your photography, they look different from jpg photos.  Raw format is just the data read directly off of the sensor with no processing by the camera.  Depending on how you configure your camera and software, raw image contrast and sharpening can be very low, white balance may not be optimized, and exposure is often set for capture / low noise instead of display / print.. This can make it tough to judge raw photos and decide which ones merit further processing.

When I returned from Maine and reviewed my photos, I bypassed some.  When I finished working on the ones I’d identified as “selects”, I went back and re-looked at those I’d set aside.  Some of them deserved attention.

A calm morning on Bubble Pond

It’s not just raw images that can be difficult to evaluate.  Infrared photos usually need processing to optimize too.

Bass Harbor Light
Bass Harbor Light

And multi image panoramas make seeing composition and field of view a challenge before the individual frames are stitched together.

Behind Sand Beach
Behind Sand Beach

I can’t tell you how to rate your images and select your best.  But what I can tell you is to be very careful not to discard something before you’re very sure that it’s not worth pursuing.  Give your photos a second chance.  Learn your software so you know how far you can go with adjustments.  And as with any thing worth pursuing, practice will make you better.

Thanks for stopping by and reading my blog. Now – go make some photos!
©2014, Ed Rosack. All rights reserved.

Avoid the Familiarity Trap

We’re blessed in Florida with wildlife we can easily photograph. Alligators are common, and many kinds of birds too.  But how many photos do you need of a Great Blue Heron, or an Alligator basking in the sun? If you live here for a while you may get jaded with our common animals.  So much so that you don’t even bother taking a photo of one when you see it.  “Familiarity breeds contempt” and it’s a real risk in photography – one you must not fall into!

I have plenty of Anhinga photos but I was still excited to make this recent one.

Wet wings and itchy back
Wet wings and itchy back – An Anhinga dries its wings and preens its back at Viera Wetlands

 This isn’t close enough for a “record” shot of the bird.  The Anhinga’s just one element of the composition.  But I like the light, the reflections, and how the bird’s pose echoes the tree’s shape.  If I had glanced at this and only seen the bird, I’d have missed the photo-op.  To be a better photographer, you have to really observe things you glance at all the time.  Watch for good light and backgrounds.  Keep an eye out for unusual behavior, poses, or patterns.  And of course pay attention to new life birds or rare animals to help keep things interesting.  Avoid the familiarity trap.

I’ve put a few other examples in this set on Flickr.

Thanks for stopping by and reading my blog. Now – go make some photos!
©2014, Ed Rosack. All rights reserved.

Adding location information (GPS) to your photos

Here comes the sun
Here comes the sun – Sunrays shining through offshore clouds mirrored on calm inshore water.  Merritt Island National Wildlife Refuge. GPS:  28°38’8″ N 80°46’33” W

I’ve been adding Lat/Lon location info to my photos for several years.  It’s helpful to others to see where I made each one.  And I like to look back and see the info too.  If you click on a photo in the blog that I’ve geo-tagged, it’ll display on Flickr with a map showing the location below the photo.

I use Lightroom’s Map module for this.  If I know where I was I can easily drag the photos to that place on the map.  For unfamiliar places, I try to remember to make at least one iPhone photo so I can copy its GPS info to the other photos I make there.   That’s what I did on my recent trip to Acadia National Park and it worked well.  But I want something a bit less manual.

It would be nice if all cameras did this automagically like the iPhone does.  The only other one I have with GPS capability is an Olympus TG-2 underwater camera that I use when kayaking.  Nikon makes an add-on GPS, but it only works with Nikon, you’d have to remember it, not lose it, and it plugs into the remote release socket – so it’s a pain when you’re shooting from a tripod.

I’ve experimented before with using my phone to record GPS tracks.  On our trip to Alaska in 2009, I used an app and later synced the tracks to photos back on my computer.  That was a pain too (the app and software weren’t very reliable).  But it seems I wasn’t paying attention to Lightroom updates since then.  I completely missed that it now has the capability to sync a captured GPX format track to photos in your library.

Screen-Shot-2014-08-29-at-12.01.05-PM

Lightroom Map Module:  The track interface is hidden in a pull down menu at the bottom of the screen. 

Using the interface at the bottom of the Map Module (shown above), you can load a track and use it to auto-tag the location of photos in a folder.  And it works very well!

So how exactly do you do this?  There are three steps:

  1. Before you leave, make sure you set the time in your cameras correctly.  The time stamp is used to sync the position from the GPS track to each photo.
  2. Use your GPS unit or an app on your phone to record a track of your movements.  There are several iPhone apps that will capture the track info.  I tried GeoTagr ($4.99 in the app store) and it worked well.  Motion-X GPS (no longer in the app store?) also works.  When I got back home, I emailed myself the .gpx file with the track information.  One warning:  sometimes these location recording apps can be power hungry.  You might want to check to make sure you don’t run down your battery doing this.
  3. Move the .gpx track file to the folder on your computer with your photos.   Then load it into Lightroom and apply it to the photos.  Easy-peasy!  It all just works!

Two more geo-tagged photos from a quick trip to Merritt Island early last Thursday:

Nearby Mangroves and distant storms
Nearby Mangroves and distant storm.   Merritt Island National Wildlife Refuge. GPS:  28°38’8″ N 80°46’33” W

Morning by the causeway
Morning by the causeway.  Parrish Park. GPS:  28°37’21” N 80°47’45” W

I like this method and I’ll probably use it in the future.  It’s much less fussy than what I tried several years ago.  Now all I have to do is remember to start the app at the beginning of a photo-op.  I wish I’d worked this out before my trip to Maine.  It was an effort to figure out where each of those photos were made.

By the way, MINWR was still quiet last week – not much wildlife or birds about.  I did see a group of White Pelicans there.  Usually, they don’t show up until November.  I’m not sure what that means, but they were fun to watch.

Thanks for stopping by and reading my blog. Now, go make some photos! And geo-tag them!

©2014, Ed Rosack. All rights reserved.