Tag Archives: ship

Long(er) cruise exposures

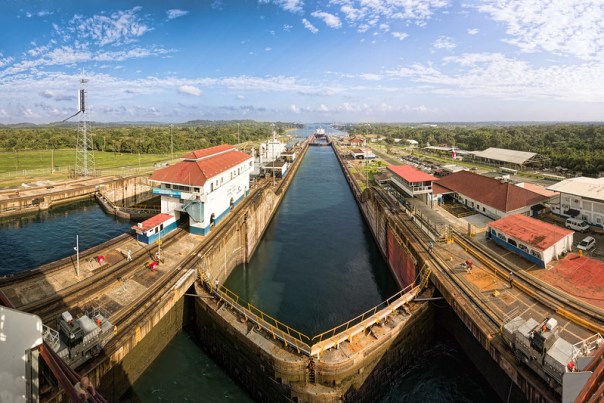
I thought you might be interested in a photo technique that I used on our recent cruise. Here’s an example image:

Journey's End

Journey’s End. (eq. FOV: 26mm, f/4.5, .8 sec @ ISO 1250)

In low light situations, I wanted the ship sharp in the foreground, and nearby water showing motion blur. I also wanted features on the horizon to be sharp (with no motion blur).

You can see the settings I used in the captions. The secret is to use a wide-angle lens, and keep your shutter speed fast enough so that the ship’s motion doesn’t result in blurred features on the horizon, but long enough so that the close by water shows some motion blur. For this image, a little less than a second worked out. Here’s another example (that was in last week’s blog too):

Approaching the Cayman Islands

Approaching the Cayman Islands. (eq. FOV: 26mm, f/4, 2 sec @ ISO 200)

Here are the steps to try this yourself:

  • Go on a cruise!
  • Choose an aperture that gives you the depth of field you want (e.g. sharp focus from foreground to horizon).  My Olympus 12-100 f/4 lens is sharp and has sufficient depth of field used wide open.
  • Choose an ISO value that results in the shutter speed you want (between 1/2 and 2 seconds).  With my micro 4/3 cameras, I’m conservative with ISO, but I’ll use up to 3200 if pressed – even for landscape shots.
  • Use your camera’s built-in image stabilization (or mount your camera on a tripod) to stabilize it on the ship.  Since my setup has the Olympus dual-IS capability, I didn’t use a tripod.  Instead, I braced myself against the ship and  hand-held these.
  • Make several exposures and check for sharpness. Since the ship is moving relative to the horizon, this setup is different from a normal dry-land photo.  To keep the horizon sharp, you’ll have to either time the ship’s motion and expose when it’s minimized (difficult), or make multiple frames and pick ones where the horizon features are sharp (easier).  I was able to get sharp images with exposures as long as 2 seconds, but I made multiple frames for insurance.

Here’s one more photo.  The light was brighter in this one, so I couldn’t get much blur in the water:

Dusk at seaDusk at sea. (eq. FOV: 24mm, f/4, 1/40sec @ ISO 200)

So that’s it.  A fun technique that will give you some nice “cruisey” images.  If you try this, let me know how it works for you.

Thanks for stopping by and reading my blog. Now – go make some photos!

©2018, Ed Rosack. All rights reserved

Panama Canal

Our visit to the Panama Canal and passage through the Gatun Locks was the main feature of our recent cruise.   As an engineer, I’ve long been intrigued by the canal and it lived up to my expectations.  It’s amazing that something built over 100 years ago in such difficult conditions is still operating and remains an import part of global commerce.

The ship’s Captain planned well.  We arrived near the entrance just in time to view the day’s sunrise.

Panamanian SunrisePanamanian Sunrise – a pilot-boat paces us as we head toward the canal entrance

The crew opened up normally closed areas at the bow for viewing and many folks crowded there to watch the activity.

Entering the Panama CanalEntering the Panama Canal

At the evening meal the night before we arrived, Nino (the maître d’) promised us the “best seat in the house” if we came to breakfast at 7:30 that morning.  We thought we had a nice view up on the bow, but decided to follow his recommendation and go down to breakfast.  It was surprising how few people were in the dining room.  He fulfilled his promise and we sat at a table at the very stern of the ship right next to the large windows on deck 2 – and it did have the best view!!  Watching the locks filling and the canal walls go by from that vantage point was captivating.  It took longer than normal for us to finish our meal!

In the Panama Canal Gatun LocksIn the Panama Canal Gatun Locks – view from the Main dining room on deck 2

The MS Zuiderdam is 106 feet wide and the canal is only 110 feet, so there’s very little clearance.

MS Zuiderdam in the Panama Canal - showing the 2 foot clearance
View from our balcony on the 6th deck – 2 foot clearance!

The operation, control, and precision while in the canal is very skilful.  The photo above shows the 2 foot clearance between the ship and the canal.  One of the “mules”  (center left) is helping to position us and move us safely through.

Once past the locks, we anchored in Gatun Lake so people taking excursions could disembark.  Then we sailed back out through the canal and tied up for a port visit in Colon Harbor, where the excursions re-joined us that night.

Colon Harbor at nightColon Harbor at night

Colon wasn’t our favorite stop, although I was able to buy a genuine Panama Hat there.  Interesting fact:  Panama Hats are made in Ecuador!

I’ve posted a short video that we made in the canal here on YouTube.  It shows our entrance followed by a time-lapse as we descend into the Gatun Locks on our return.  Take a look if you get a chance.

Thanks for stopping by and reading my blog. Now – go make some photos!

©2016, Ed Rosack. All rights reserved.