Tag Archives: panorama

Jetty Park, Cape Canaveral

Intro / Description

Happy New Year!  Back to basics with my first post of 2012:  A photo-op review.

When I was in the Navy, I was stationed at the Naval Ordinance Test Unit at Cape Canaveral for a while – so I’m familiar with the port and Jetty Park.  But I’d never really investigated it as a photo-op.  I had some time last week, and decided to visit.

Jetty Park is located on the south side of Port Canaveral in Brevard County.  Depending on where you leave from, it’s a little over an hour from Orlando, basically a straight line along the Beachline Expressway (528 toll road).  In addition to the jetty and 1200 foot fishing pier, there’s also a 120+ site campground and beach (with lifeguard) at the park.

Info for Photographers

Photo hints:

The rocks, pier and seaside vegetation can provide some interesting foreground for sunrise landscapes.

The sun rises every morning...The sun rises every morning…But no one know what it will look like. This was the view before dawn from the beach at Jetty Park.

You can also see a variety of shore birds.  I saw Brown Pelicans, Northern Gannets, Ruddy Turnstones, Royal Terns, various Seagulls and others that I haven’t identified yet.

A place like this is also great for practicing your BIF (birds in flight) techniques.  Pelicans make especially good subjects, since they tend to glide in a predictable straight line, but other birds are also flying in and around (see the last photo, below).

Tripod/Monopod:

No restrictions, so bring yours and use it.

Lenses:

This will depend on your subject.  I used my tripod mounted Nikon 16 – 35mm f/4 VR Wide angle for landscapes and sunrise.  When the light got a little better, I switched to hand holding my Sigma 150 – 500mm f/6.3 for birds.  You can get up close to some of the birds, so a shorter telephoto might come in handy too.  For example, this Brown Pelican wouldn’t fit in the field of view at 500mm.  Since the bird was so still, I made a multi-shot panorama.  I like to use this technique when I can since the result can be a  higher resolution image (this one is 18.5 Megapixels, un-cropped).

Posing Pelican Pano

Best time to visit:

Day visitor hours are 7am to dusk.  Take this into account if you’re planning to make some sunrise photos.  I didn’t and the morning I went, sunrise was at 7:15.  I arrived about 6:45 and the gate was still closed, so I drove around a bit to see if there was somewhere else to make a sunrise photo (I didn’t find one).  When I returned at about 6:55 they were unlocking it.  I had less time than I wanted to find a good spot and setup, but I did manage to get some photos I like.

Winter is probably a good time of year to go.  It’ll be less crowded (with people) and more crowded (with birds).  Many of the birds could be winter visitors too.

Northern Gannet in Flight

Northern Gannet in flight:  This Pelagic species is a winter migrant to the waters off of the Florida coast.

Other:

There’s a $10 per day usage / parking fee.

The morning I was there I saw a young man land a large fish from the end of the pier.  This might be a good place to combine your interest in fishing, camping and the beach with a photo side excursion.

There’s a lot of shipping activity at the port.  Cruise ships and fishing boats enter and leave regularly.  I think you can still occasionally see a submarine that’s visiting too.

Jetty park is close to both Viera Wetlands and Merritt Island National Wildlife Refuge.  If you have time for a little longer trip, you could combine a visit here with a second stop at one of those places.  The morning I went, I also stopped by Viera to see what was going on there.

Summary

I added a few birds to my life list and a few photos I really like to my archives.  You can too. Check out the other photos I made there in this set on Flickr.  Let me know how your visit to the park goes.

My Gallery / Flickr photo set:  http://www.flickr.com/photos/edrosack/sets/72157628638922015/with/6606239041/
Their Website:  http://www.portcanaveral.com/recreation/beaches.php
Address / Phone: 9035 Campground Cir, Cape Canaveral, FLView in Google Maps
Central Florida Photo Ops Rating:  A sunrise and shorebird showplace!

Thanks for stopping by and reading my blog. Now – go make some photos!

©2012, Ed Rosack. All rights reserved.

Cincinnati Christmas

Lynn and I had a wonderful visit with our daughter Mary at her place in Cincinnati over Christmas. Once again, she was the perfect hostess and kept us busy with all sorts of activities. We spent a lot of time eating, both at restaurants (Nada, Melt, Christmas brunch at the Hilton, Tom+Chee, Papa Johns pizza, Cracker Barrel) and cooking (crab cakes, Quiche, salmon, gingerbread, etc.) and too much time shopping (antique mall, after Christmas sales, outlet mall). In between we went to the Nutcracker, bought hats at Batsakes, visited the local wine shop and gave her new Nespresso machine a real work out. It was primo family time, but I did sneak in a little photography:

Roebling Bridge and Ohio River at night from Kentucky

Play time at Union Station
Play time at Union Station – Cincinnati, Ohio. I usually wait for people to clear out when I’m trying to make a photo. This time I went ahead and made it while these two girls played around the fountain. Since this is a stitched panorama, they show up multiple times, which I think adds to the image.

Cappuccino
Cappuccino: We enjoyed using Mary’s new machine and overdosed on caffeine while we were there.

What a great visit! You can see more photos from our trip to Cincinnati in this set on Flickr. You can re-read my other posts mentioning Cincinnati here and here.

Thanks for stopping by and reading my blog. Now – go make some photos!
©2011, Ed Rosack. All rights reserved

Viera Wetlands Visit

Lynn and I drove over to Viera Wetlands yesterday morning in her Prius. This was our first photo outing with the vehicle and it is outstanding for this purpose. There’s plenty of room. It’s very fuel-efficient when driving in the slow speed mode you use through an area like the wetlands. And, it’s quiet. Cars normally serve as a very good blind for bird photography, but when your vehicle is this quiet, you can get even closer to the subjects without scaring them.

This first image was one of the scenes that we saw. We’d been there for a while and were just turning a corner out in the middle of the wetlands when we both commented about the light on the left side of the car. The sun through the clouds was changing rapidly and I wasn’t set up for landscapes. I ended up asking Lynn to back up and then scrambling to switch to my wide-angle lens. I made the photo using this two image composite technique I described here. I think it came out pretty well for a hand-held, scramble photo.

Swamp grass, flowers, water, and sky

There is lot less activity at the wetlands than there was a month or two ago, but we still saw a good variety of birds. I’ve included a couple below and you can see more in my Viera Wetlands set on Flickr.

Anhinga dryiing wings
Anhinga drying wings: The bird was only a few feet from the car. I had to stitch together a two image panorama, in Photoshop.

Female Blue Wing Teal
Female Blue Wing Teal: This bird let us approach very closely.

Thanks for stopping by and reading my blog. Now – go make some photos!
©2011, Ed Rosack. All rights reserved.

Washington DC

I’ve written about photography on business trips before (for instance here). If you’re willing to put up with the hassle of carrying your photo equipment (or you can travel “photo light”), and if you have an opportunity to leave early or stay late, then you may be able to enjoy some of the photo ops at your destination.

The pre-dawn Potomac River, Georgetown,  and Washington DC from the Francis Scott Key Bridge in Rosslyn, Virgina

The pre-dawn Potomac River, Georgetown, and Washington DC from the Francis Scott Key Bridge in Rosslyn, Virgina: Getting up at 5:30am and leaving my warm, cozy room to walk down to the river with my tripod and camera in the cold and dark wasn’t easy. Timing the 4 – 8 second exposures between vibrations from passing cars was also a bit difficult. But I like the result.

I had a business trip to Washington DC this week and needed to be there first thing on Monday.  Instead of flying in Sunday night, I made arrangements to get out on the first flight Sunday morning (whew, that was an early alarm!).  This gave me few hours in DC to act like a tourist.  The weather was cloudy with some rain, but that actually turned out to be an advantage for some of the things I photographed and I did manage to make some images that I like in two or three different places while I was there.  Washington is a target rich environment for photo ops – where to start?

At the first place, birds sang as I walked paths through the area.  Looking up and searching for them, I could see trees beginning to bud out with leaves and flowers, signaling the start of Spring and triggering many thoughts about nature.  As I continued, my eyes were drawn back to earth where the sight of graves triggered thoughts about sacrifice by many brave people.  I also thought about predictions of the decline of the USA, and it occurred to me that these don’t take into account the power of our belief system.  Our economy is large, and we are creative — but our true strength is that so many believe in our rights and freedoms and are willing to defend them with their lives.

Tomb of the unknowns, Arlington National Cemetary

Tomb of the unknowns, Arlington National Cemetery: I’d never been to Arlington before last Sunday. As a US Navy Veteran and a patriot, I have to admit it made a huge impression on me.

Arlington National Cemetery is located on a hill across the Potomac from Washington DC.  It’s the former home of Robert E. Lee and was taken over by the Union when the Lee family failed to pay taxes.  Arlington house (his former manor) is surrounded by grave sites of union soldiers so that if he ever tried to return, he’d have to cross that line of soldiers to enter his home.  [4/16 update:  Here is a good article about Arlington house:  http://www.nationalparkstraveler.com/2011/04/arlington-house-home-robert-e-lee7966]There’s a good view of downtown DC and the country’s power base from up there.  I hope that Congress glances up at Arlington occasionally before it makes decisions that may result in more grave sites.  Arlington is only a few minutes from downtown Washington, and close to Reagan airport.  There’s plenty of info on their web site for visitors.

After Arlington, I drove into downtown DC. Since it was Sunday and raining, there weren’t many people around and I was able to park about two blocks from the Lincoln Memorial and walk over for a few photos. Unfortunately, there is a lot of construction going on right now – the reflecting pool between the Lincoln Memorial and the Washington Monument was drained, and this limited the compositions available.

The Lincoln Memorial and me

The Lincoln Memorial and me: Last Sunday in Washington DC was cloudy with a bit of rain, so there weren’t too many people out and about in the city. I circled around to the south west side and set up my tripod for this shot. I think it’s pretty rare that you get a chance to capture an image of the Lincoln Memorial without people in the photo.

The view of the Lincoln Memorial above is a multi-shot panorama / HDR using 27 individual photos.  The full resolution result is about 45 Mega-pixels in size.  The power of the software we have available today always amazes me.

Take advantage of your travel opportunities.  Turn them into photo ops.  You might like the result.

If you click on the photos above you can see larger versions on Flickr.  You can also see these photos and a few others from this trip in this set on Flickr.

Thanks for stopping by, now go make some photos!

© 2011, Ed Rosack. All rights reserved.

Two Image Pano / HDR / Focus Stacking

Intro

It’s been a while since I posted an in depth technique article, so I thought I’d do another one.  Warning: Major photo geek out ahead.  If you’re not into HDR, panoramas, post processing, etc. please move along.

OK, now that it’s just us photo nerds left, wanna see some sausage made?  Let’s get started.

My question to you:  What if you want more pixels in your final image, more dynamic range in both highlights and shadows, and better depth of field, all by using a much simpler technique than you might normally use?  How would you go about it?  I’ll explain one approach I used recently to make this lead photo from my previous post:

Sunrise at Viera WetlandsFinished image (click to view on Flickr)

I made this with a 12 megapixel Nikon D700, but my final image file is 4238 pixels wide by 5776 pixels tall (about 24.5 Megapixels).  It has good depth of field with objects from very close out to the horizon in focus.  It also has good dynamic range with both the ground and the sunrise & clouds well exposed.

Details

If you were going to create an image like this using conventional techniques, it could require 6 or more exposures.  You’d mount your camera on a tripod and manual focus. You might analyze the scene to decide on an optimum exposure.  Then you’d make three bracketed exposures around that, first of the lower portion of the image, then shifting your camera viewpoint up toward the clouds – three more bracketed exposures.  Then you’d use panorama software to combine the three pairs of images at each exposure value, followed by HDR software to combine the three resulting panoramas into an HDR file and tone map it.  You might have to play with the result quite a bit to eliminate noise, ghosting, etc. introduced by the HDR software.  And if you wanted to stretch the depth of field, you might go through this twice with different focus points, and combine them too.  In some situations, you could also try using graduated neutral density filters to control dynamic range.

Whew – that could be a whole lot of work!  I didn’t do all that.  Instead, I used a much simpler idea.  Basically, I just combined two images manually in Photoshop.

If you’re still with me, read on (it might look complicated, but it’s actually harder to read about than do).  Here are the details.

  1. I hand held my camera and used an image stabilized lens so I didn’t have to worry too much about longer exposures.  The camera was in landscape orientation.  I used aperture priority, with matrix metering auto exposure, and auto focus using the center focus point.  When I made these, I held my camera very carefully to make sure there was no side to side movement and that the horizon was level so there was no rotation between shots, and I made sure there was at least 30% vertical overlap between the two images.  I also shot in RAW mode for the best dynamic range and control over processing.
  2. For this first photo, I pointed at the sky and let the camera auto expose for the bright clouds and sunrise.  It also auto focused on the clouds in the middle of the frame.  It’s at 16 mm, ISO 200, and f/8 @ 1/160 sec.  Here’s the unprocessed RAW source image for the sky:
  3. RAW source image for the sky
  4. For this second photo I pointed down at the ground and this time the camera exposed for the dark foreground.  It auto focused on the ripples in the water just short of the first coot  (again in the middle of the frame).  It’s at 16 mm, ISO 200, and f/8 @ 1/25 sec. (almost 3  stops more exposure).  Here’s the unprocessed RAW source image for the ground:
  5. RAW source image for the ground
  6. Then I processed the RAW photos.  I used Capture NX2 and converted them to TIF, but you could use Photoshop to convert them and not need CaptureNX2.  I set picture control to neutral, white balance to daylight, enabled distortion correction, and tried to bring both photos closer in overall brightness.  Here are the two processed images:
  7. Sky image after RAW conversion
    Ground image after RAW conversion
  8. Next I loaded the files into Photoshop as separate layers in the same file, and used Photoshop’s Edit / Auto Align Layers function to place the two images relative to each other.
  9. At this point, I added a layer mask (reveal all) for the sky image and then painted black to remove the portions below the horizon that I didn’t need.  It was fairly easy to blend the images by changing the brush opacity and either erasing or painting in until it looked correct.
  10. The final steps then are the same ones used for any photo:  crop, sharpen, levels, apply any creative filters you like, etc.

Once you go through this a few times, it’ll be easier and you can, of course vary some of these steps based on your own preferences.

Conclusions

I think this “Two Image Pano / HDR / Focus Stacking” technique can be really useful and it has several advantages over standard approaches normally used for this kind of image.

Benefits

  • It’s simpler than conventional techniques, and yields very good results.
  • You can hand hold in many cases, especially if you use an image stabilized camera or lens.
  • It uses the camera’s auto exposure effectively to expose correctly for the different areas of the image.
  • You can post process with just Photoshop – other software isn’t required.
  • It greatly increases the dynamic range of the final image without requiring HDR processing or software.  It doesn’t require a straight line horizon like graduated neutral density filters would.
  • Depth of field can be increased over that in a single exposure or in a conventional pano / HDR approach.
  • It also substantially increases vertical field of view.

Limitations

This technique is situation dependent: It’ll only produce portrait or perhaps square orientation output images (although you’ll have lots of pixels to crop to other formats).  It only works where the scene is easily divided into two portions where the brightness varies vertically.  Also,the dynamic range increase available from just two images may not be enough in all situations.

So, should you use it?

Why not?  Under the right conditions, it can generate very good results with minimal effort.  Now that you’ve heard about this technique, you can watch for scenes where you may be able to use it.

Then you can try it – and please let me know how it works for you.

© 2011, Ed Rosack. All rights reserved.

My Favorite Photos of 2010

I hope that all of you and your families and friends are having a joyful and happy holiday season!

The weather has been pretty gloomy here this weekend, so I didn’t get a chance to go out and make any new photos. I thought it would be a good time to jump the gun and put together my second annual “Favorite photos of the year” post.

One again, I’ve gone through the photos I made in the last 12 months. I use Lightroom to rate them from 0 through 5 stars. My rating system definitions are:

  • 1 star – The photo is interesting
  • 2 stars – The photo is worth showing to others
  • 3 stars – The photo is the best of (or one of the best of ) any given photo shoot
  • 4 stars – My favorite photo of a year
  • 5 stars – My favorite photo (ever)

Photos without stars are seconds or not so good versions of other photos. I usually keep them, but they probably won’t get any more attention. I’ve used this system consistently, and it seems to work for me. Of course, this is all subjective and my opinion only. Feel free to disagree, but I hope you’ll enjoy looking at the ones I’ve chosen.

Again in 2010, I was really blessed with a huge number of photo opportunities. On my hard drive in my 2010 folder, I have about 11,700 files (not all are photos), taking up 145GB of space. Of these:

  • 5997 of the 2010 images have been cataloged in Lightroom. Many of the rest are source images for multi-shot panoramas or HDRs, or high rate bursts that I selected from.
  • 1139 are rated 1 star or higher
  • 639 are 2 star or higher
  • 88 are 3 star or higher
  • 1 is 4 star, and
  • None are 5 star (I’m still not done taking photos yet!)

Of the 88 that are 3 star or higher, I’ve selected 10 images to include in a gallery of my favorite 2010 photos. You can click on each of these to go to Flickr, where you can see a larger version. One interesting difference from my 2009  Favorite Photos post is that all the ones this year were made in the Central Florida area.

So, here we go…

My #10 favorite 2010 photo is: Waving Gator. Gators always smile at you, but this one was even waving! No, I didn’t Photoshop the wave. The gator really did it all by itself. I have witnesses.

Momma gator guarding nest and 4 (blurry) babies

My #9 favorite 2010 photo is: Roadside Flowers. Wildflower photography is a little different in Central Florida than some other areas of the country. Some might say it’s more challenging here, and I doubt anyone comes to Central Florida specifically to photograph wildflowers. None the less, wildflower photo ops are around here too if you keep your eyes open. These are along the Florida Turnpike. I saw them while driving home from Gainesville, Florida and just had to stop and photograph them.

Roadside flowers (IMG_0713)

My #8 favorite 2010 photo is: Cattle Egret in Flight. For once, I was ready when this bird flew close by. Right lens, correct camera settings, and paying attention. I could almost feel my camera nail the shot. I wish I felt like that more often.

Cattle Egret in flight

My #7 favorite 2010 photo is: One Second Koi or “One second, Koi” or “One second Koi?” I don’t usually make this sort of photo. On this occasion, I decided to experiment and I was very pleased with how it turned out.

One Second Koi

My #6 favorite 2010 photo is: Sunrise, fog, palms, pond. This scene is close to the north-west shore of Lake Jessup. On this particular morning, the mist in the distance and the clouds on the horizon shaping the sunlight drew my attention.

Sunrise, fog, palms, pond

My #5 favorite 2010 photo is: Burning waters @ Orlando Wetlands. We were at Orlando Wetlands Park back in late September before dawn. It was raining very softly, but not enough to discourage us from hiking out to Lake Searcy and capturing this scene. I like the light hitting the flowers on the left, the rain cloud in the distance, and the dawn colors in the sky.

Burning waters @ Orlando Wetlands

My #4 favorite 2010 photo is: Grasshopper and Donuts perform photo-magic on the beach under the stars for an audience of three.

We have a local camera club and three of us decided to go over to the beach to try to photograph the Perseid meteor shower. My two friends went out on the beach while I stayed up on the boardwalk. At one point I looked down and could barely make out this scene in the dark. I like the way the camera’s LCD is lit up and draws the viewer’s eye to the two photographers. I also like how the three strangers (who were watching for meteors) look like they’re watching my friends.

I was using ISO 1600 and my “nifty 50” 50mm lens at f/1.8 to keep exposures as short as possible (I was trying to prevent the stars from trailing), and I had focused manually at infinity. All I had to do was switch on live-view, re-compose, and zoom in on my friend’s white shirt to manually re-focus. Fortunately no one moved very much during the 4 second exposure. It’s really amazing how modern cameras can capture scenes that are barely visible to our eyes! And yes, we did get a few meteor photos. (Grasshopper and Donuts are nicknames for the two photographers in the scene).

Grasshopper and Donuts perform photo-magic on the beach under the stars for an audience of three.

My #3 favorite 2010 photo is: Cyprus tree and knees. I wanted to try the Nikon D7000 on some landscape photos, but didn’t really have time to go anywhere special. This tree is very close to my home – along the shore of Lake Jessup in Central Winds Park. Cypress trees make very good photo subjects since they can provide both near and middle distance content for a scene.

Cyprus tree and knees

My #2 favorite 2010 photo is: Cormorant at the Circle Bar B. These birds have been posing for me lately. I think it’s amazing how pretty they look in the right light.

Cormorant

And … my #1 favorite photo of the year 2010 is: Ponce Inlet light, sunset, bird. Imagine if you will, a perfect dusk scene with sunset colors drifting up from beyond the horizon. In the distance is a photogenic lighthouse that’s illuminated just enough to make it stand out against the bright sky. Beneath your feet, slow-moving Atlantic Ocean surf rolls up on rocks. You spot a bird in the surf and hope it will be still while your shutter remains open for the seconds necessary to record the image as your mind’s eye sees it – tack sharp from foreground rocks all the way to the distant lighthouse, with silky smooth water reflecting the dusk sky. Imagine coming home and seeing the image that you imagined right there on your computer screen in all it’s glory. That’s what happened to me last August.

Ponce Inlet lighthouse, sunset, bird

I’ve uploaded these photos to this Flickr set, and you can click this link to watch a slide show. When you watch the show, you might want to click the “show info” link.

Thanks for looking.

All content ©2010, Ed Rosack. All rights reserved.

The St. Johns River near Sanford and Deland

Intro / Description

At 310 miles, the St. Johns is the longest river in Florida.  It’s one of the few rivers in the US that flow from south to north.  Near Orlando it forms the dividing line between Seminole and Volusia counties, and it’s a favorite destination for fishermen, boaters, and folks on jet skis.  It should be a favorite destination for photographers, too.

A beautiful place to catch some fish

Vince invited Tom and I out on his boat for a photo expedition a while back.  We finally took him up on his offer  a couple of weeks ago.  We were up early, put in near the I-4 bridge right around dawn, and motored north.

There’s a rule of thumb about sunrise and sunset.  The rule of thumb is that there’s no rule of thumb telling you when the good colors / conditions will occur.  You have to hang around and keep making photographs until you’re sure the show is over.  The next photo is a good example of this rule (or is it a lack of rules?):

The St. Johns River near Blue SpringsThe St. Johns River near Blue Springs

When we first got out on the river around sunrise (~7am), there was some color in the sky, but nothing spectacular.  About an hour later the conditions were quite different and much more photogenic.

This image is a 5 frame panorama that I merged in Photoshop. I made the exposures hand-held from a moving boat, so they weren’t aligned all that well.  In post, I first ran all 5 RAW frames through Lightroom and adjusted several  parameters  identically, including color balance, lens profile, and camera profile.  Then I moved to Photoshop to do the merge.  After that, I worked on it a little more to take a small curve out of the shoreline, and then used Topaz Denoise 5 to selectively reduce the residual noise that you could see in the full res version.  The last step was to add a duplicate layer and run it through Topaz Adjust 4.  Back in Photoshop, I modified the transparency of the resulting layer and the strength of the Topaz filter.  I also selectively erased portions of the Topaz layer until I liked the result.

Info for Photographers

Photo hints:  We saw many kinds of birds and several alligators.  But the wild life doesn’t like power boats very much.  We had a hard time getting close to any of the birds, and alligators would see or hear us coming and submerge long before we got close to them.   If you have time, you might try coasting in from a longer distance – but that could take a while and we didn’t try it so I can’t tell you whether it will help.  You can also look for alligators on docks.  They don’t seem to be as skittish when they’re out sunning themselves.  In fact, they seem quite friendly.

Gators always smile at you, but this one was even waving!

Gators always smile at you, but this one was even waving!

Tripod/Monopod: They won’t do you much good on a moving boat, so save yourself some trouble and don’t bring them unless you’re going ashore.

Lenses:  The boat motion will also make hand holding a long lens difficult, so don’t bother bringing really long glass either.  Instead, carry your wide-angle lens and maybe a short telephoto or zoom.

Best time to visit:  Early in the morning on a calm day before the other boats show up.  The water should be calm,  undisturbed, and very scenic.  And you can get some photography in before it gets too hot.

Calm, dawn light

Other:  There are several places to stop and eat along the river.  If you want to grab lunch ashore, do some research first.  Also, if you don’t have a friend with a boat, don’t let that stop you.  Nearly every marina we passed had pontoon  and house boats for rent.

By the way, if you’re visiting Florida you may not know that it’s probably not a very good idea to swim in the river.  The alligator in the photo above was about 5 feet long.  It (along with some larger relatives) lives in the river.  We also occasionally have people  infected with water-borne diseases (such as amoebic meningoencephalitis), although that usually occurs in lake water.

Summary

We had a great time and were very grateful to Vince for taking us out.  I got a photo or two that I really like.

My Gallery /  Flickr photo set: http://www.flickr.com/photos/edrosack/sets/72157624991879878/with/5010338576/
Website: N/A
Address / Phone: View in Google Maps
Central Florida Photo Ops Rating: Very scenic.  If you have a boat, go!

©2010, Ed Rosack. All rights reserved.

Ponce Inlet, Florida – Lighthouse and night photos

Imagine if you will, a perfect dusk scene with sunset colors drifting up from beyond the horizon. In the distance is a photogenic lighthouse that’s illuminated just enough to make it stand out against the bright sky. Beneath your feet, slow-moving Atlantic Ocean surf rolls up on rocks. You spot a bird in the surf and hope it will be still while your shutter remains open for the seconds necessary to record the image as your mind’s eye sees it – tack sharp from foreground rocks all the way to the distant lighthouse, with silky smooth water reflecting light from the dusk sky. Imagine coming home and seeing the image that you imagined on your computer screen in all it’s glory. This imaginary trip can be made real for you too if you venture over to Ponce Inlet, Florida and have a bit of luck, like we did.

Ponce Inlet lighthouse, sunset, bird

Ponce Inlet lighthouse, sunset, & bird – (Nikon D700, Nikkor 24-70mm lens @ 70mm, 5 second exposure @ f/11, ISO 200)

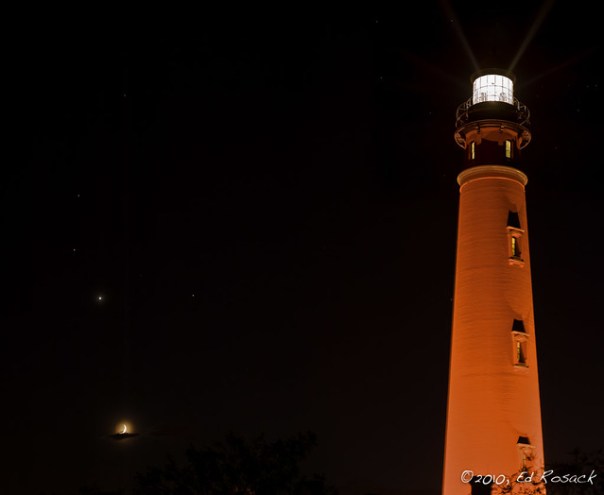
Once again my friends, the Photography Interest Group braved many hazards to bring you extraordinary photographic insight into another wonderful place for outstanding Central Florida Photo Ops. Three of us wanted to do something a little different from our normal photo excursions. We’ve been talking about night-time / low light photography so we decided to visit Ponce Inlet last Thursday night to try out some techniques. It was also an interesting day from an astronomical perspective, since there was a conjunction of Mars, Venus, Saturn and the Moon in the western sky after sunset, as well as the annual Perseid meteor shower to observe later in the evening. We planned this as a “scouting trip”, since we’d never been there (photographically at least), and our expectations for “wall hanger” images were pretty low. We figured we’d scout the place and come back another time armed with knowledge and hoping for good results.

The weather report wasn’t very good. Earlier in the week, heavy cloud cover and rain were predicted, and it was cloudy and rainy earlier that day. But by the time we arrived at Ponce inlet the clouds had parted and we were left with beautiful (but very hot) conditions.

We stopped first at the jetty and I made several photos including the one above and this one of a fisherman below the conjunction.

Ponce Inlet at dusk, fishing under the Moon & Venus

Ponce Inlet at dusk, fishing under the Moon and Venus – (Nikon D700, Nikkor 24-70mm lens @ 32mm, 13 second exposure @ f/22, ISO 200)

Next, we ventured over to the lighthouse looking to pair it with the conjunction. We had a bit of trouble finding the right place to park. This photo is from the parking lot on the south side of the lighthouse. We didn’t get there in time, but it’s possible that the view would have been better from the lot on the north side – something to try next trip. I made this two shot panorama with a 70 – 200mm lens. You could use a wider angle lens as well.

Ponce Inlet light, Moon, Venus, Mars, SaturnPonce Inlet light, Moon, Venus, Mars, Saturn – (Nikon D700, Nikkor 70 – 200mm lens @ 70mm, 6 second exposure @ f/8, ISO 200, 3 exposure composite panorama)

When we finished at the light house, there was time for a “Slurpee break” to cool off before moving down the beach. We found a good off beach parking area not far from the lighthouse and stopped to look for debris from comet Swift-Tuttle’s tail. Within the first few minutes (before our camera gear was set up), “Grasshopper” saw a large fireball meteor. But that was the only large one that night. Here’s a photo of “Donuts” and “Grasshopper” making star / meteor photos.

Grasshopper and Donuts perform photo-magic on the beach under the stars for an audience of three.Grasshopper and Donuts perform photo-magic on the beach under the stars for an audience of three – (Nikon D700, Nikkor 50mm lens, 4 second exposure @ f/1.8, ISO 1600, manual focus on Donuts’ white shirt with Liveview)

For the set up at this place, I combined my old 50mm f/1.8 lens with the high ISO capabilities of the Nikon D-700. I wanted to make my exposures short so that the stars didn’t trail. I shot in manual exposure mode and checked the results to make sure I was getting what I wanted. There were some high clouds and haze and coupled with the light pollution in the area that made exposure tricky. It was too easy to overexpose the haze / glare, leading to an incandescent glow that hid the stars and meteors. I also used manual focus. I started by using Liveview enlarged around what I wanted to focus on. But with the 50mm lens, it was just as simple to use the infinity mark on the scale. I did manage to catch a couple of meteors, and here is one photo I made.

Long, dim, green Perseid meteorLong, dim, green Perseid meteor – (Nikon D700, Nikkor 50mm lens, 3 second exposure @ f/1.8, ISO 1600, manual focus on infinity mark)

All in all, this was a very fine expedition and we all had a lot of fun. It exceeded expectations and you should try it sometime!

If you do want to try this, make sure you have both wide-angle and telephoto lenses and a sturdy tripod with a cable release. You can also read my post on night time photography for some hints on technique.

Click on any of the photos above to see them larger on Flickr. You can go here to see my Ponce Inlet photo set. “Donuts'” photos are here, and “Grasshopper’s” are here.

©2010, Ed Rosack. All rights reserved.

Sunrise, swamp, birds, gators

We’re really blessed in Central Florida with many places that photography and nature enthusiasts can visit.  The Photography Interest Group took another trip to Black Point Wildlife Drive yesterday.  There was a lot to see.

750mm (eq.) sunrise
I used a 750mm effective focal length lens to shoot this sunrise photo. I like the transparent look of the trees in front of the sun.

Blackpoint panorama

A 4 shot panorama.

Kevin McKinney (who has the knack for spotting things) let us know there were kingfishers in the area.  I saw this one (my first ever) and made a very quick photo hand-held out the window at 750mm (eq).  Thank goodness for optical stabilization!  It was terribly back-lit, but the best I could do. It flew off as soon as we opened the door, living up to their reputation for being very skittish.

Belted Kingfisher (female)
Belted Kingfisher

Like the previous time I was there, we saw many spoonbills.  This one posed for us for a while.  It wasn’t until I got home that I noticed the fishing line wrapped around its bill.  Please, please think twice before you throw anything in the water.

3/22/10 update:  Good news!  Kevin Krause reports that the fishing line was gone a little later.

Spoonbill
A beautiful bird. I hope it can get the fishing line untangled from its upper bill.

And finally, here’s another gator eye photo. In this one you can see both Keith and Ed in the upper right.

Another Gator eye reflection
2 photographers, 4 meters away, 8 foot wild alligator.

These and other photos are also posted in my Black Point set on Flickr, where you can view a larger version of them.  For more information on Black Point, you can visit the official site, or search my blog for earlier posts I’ve done.  Thanks for visiting!

©2010, Ed Rosack. All rights reserved.

My favorite photos of 2009

First, I want to wish all readers of this humble photo blog a very

HAPPY NEW YEAR!

Second, this year your devoted author has decided to join the growing tradition where photo blogs post a collection of their favorite photos from the year.

To accomplish this, I’ve gone through the photos I made in 2009 and used Lightroom to rate them from 0 through 5 stars. The rating system I’ve adopted is as follows:

  • 1 star – The photo is interesting
  • 2 stars – The photo is worth showing to others
  • 3 stars – The photo is the best of (or one of the best of ) a given shoot
  • 4 stars – My favorite photo of a year
  • 5 stars – My favorite photo (ever)

Photos without stars are seconds or not so good versions of other photos. I’ll keep them, but they probably won’t get any more attention.  Since adopting this rating system, I’ve tried to use it consistently.  Before this I would rate images, but the meaning of the ratings would vary.  As far as what they mean now, it’s all subjective and my opinion only.  Feel free to disagree, but I hope you’ll enjoy looking at the ones I’ve chosen.

I was really blessed in 2009 with a huge number of photo opportunities.  On my hard drive in my 2009 folder, I have about 16,000 images, taking up 164GB of space (I shoot mostly in RAW).  Of these:

  • 3804 of the images have been cataloged in Lightroom.  Many of the remainder are source images for multi-shot panoramas or HDRs, or high rate bursts that I selected from.
  • 1084 are rated 1 star or higher
  • 692 are 2 star or higher
  • 75 are 3 star or higher
  • 1 is 4 star, and
  • None are 5 star (I’m not done taking photos yet!)

Of the 692 that are 2 star or higher, I’ve selected 44 (mostly 3 star) images to include in a gallery of my favorite 2009 photos.  You’ve seen many of these photos in this blog, already.  But where it made sense, I re-processed them to try and improve them.  Here are the top ten. You can click on each of these to go to Flickr, where you can see a larger version.

My #10 favorite photo is:  Great Blue Heron in flight.  This heron didn’t like me aiming my camera at it.  It’s making a lot of noise as it leaves the area.  I was able to pan with its motion to get a sharp shot.
Great Blue Heron in flight

My #9 favorite photo is: Ketchikan harbor.  The trawler Isis, a house in the background, and the parked float plane are very representative of Alaska.
_DSC5669

My #8 favorite photo is: Black Point Sunrise. This reminds me of a boundary of a set of points in a complex plane (i.e. http://en.wikipedia.org/wiki/Mandelbrot_set)
Black Point Sunrise

My #7 favorite photo is: Glacier Bay Sunrise, A dawn panorama heading in to Glacier Bay National Park.
Glacier bay sunrise panorama

My #6 favorite photo is: Black-bellied Whistling-Duck in flight.  We saw this unusual and photogenic duck at Orlando Wetlands Park.
Black-bellied Whistling-Duck in flight

My #5 favorite photo is: Lake Lily Park tree and bird at dawn.  Sometimes you go out specifically to photograph.  Other times you go out just  carrying your camera.  It’s exciting to me when I find a photo like this one while I’m just out carrying my camera.  The light on this Cyprus tree caught my eye as we walked around the Lily Lake  one Saturday morning looking at their flea market.  The bird in the middle distance was a bonus.
Lake Lily Park tree and bird at dawn

My #4 favorite photo is: Black Point Wildlife Drive: Wide angle, winter dawn. On this particular morning, it was hard coming up with any good photo inspiration for the sunrise.  There were no clouds, not much color in the sky, not a lot of interesting landscape detail, no cooperating wildlife, the wind was blowing pretty hard, etc.  This palm tree had an interesting vine growing in it that was pointing back toward the road, so I  made it the subject of the picture and violated all the composition rules by putting it way off too one side.  To me, the road leading past the tree could represent the last part of the long journey of exploration and learning that led to being able to make this photo in this place at this time. The road is empty because each person’s journey is unique. Oh, and BPWD just happens to be a one way road – toward the photographer. The somewhat surreal colors come from a program called “Photomatix” that will “tone map” multiple, bracketed exposures.  Anyway, I liked it too.
Blackpoint Wildlife Drive: Wide angle, winter dawn

My #3 favorite photo is: Gorilla watching people, Pangani Forest Exploration Trail, Disney’s Wild Kingdom.
Gorilla watching people

My #2 favorite photo is: Breaching humpback, off shore from Juneau, Alaska.  In the full res version, the two white dots in tree to the upper left behind the whale are bald eagles.
Breaching humpback whale near Juneau

And … my #1 favorite photo of the year is: Ship, water, glacier, rock.  A multiple shot panorama showing Johns Hopkins Glacier in Glacier Bay National Park from the cruise ship MS Westerdam.  The full res version of this photo is 7747 x 4716 pixels = 36.5 megapixels.
Panorama view of Johns Hopkins Glacier from Cruise ship deck

I’ve posted a gallery of all 44 images on my website at www.edrosack.com/BO09.  I’ve also uploaded them to this Flickr set, and you can click this link to watch a slide show at Flickr.  When you watch the show, you might want to click the “show info” link.

Thanks for looking.

All content ©2009, Ed Rosack. All rights reserved.